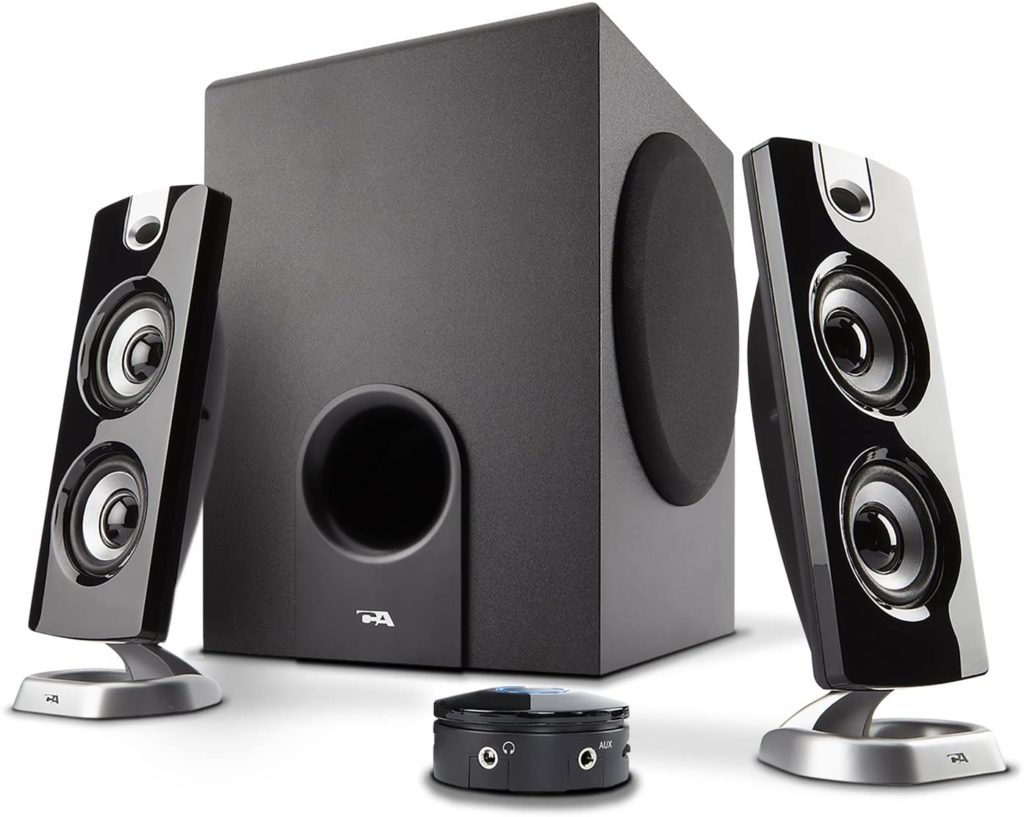
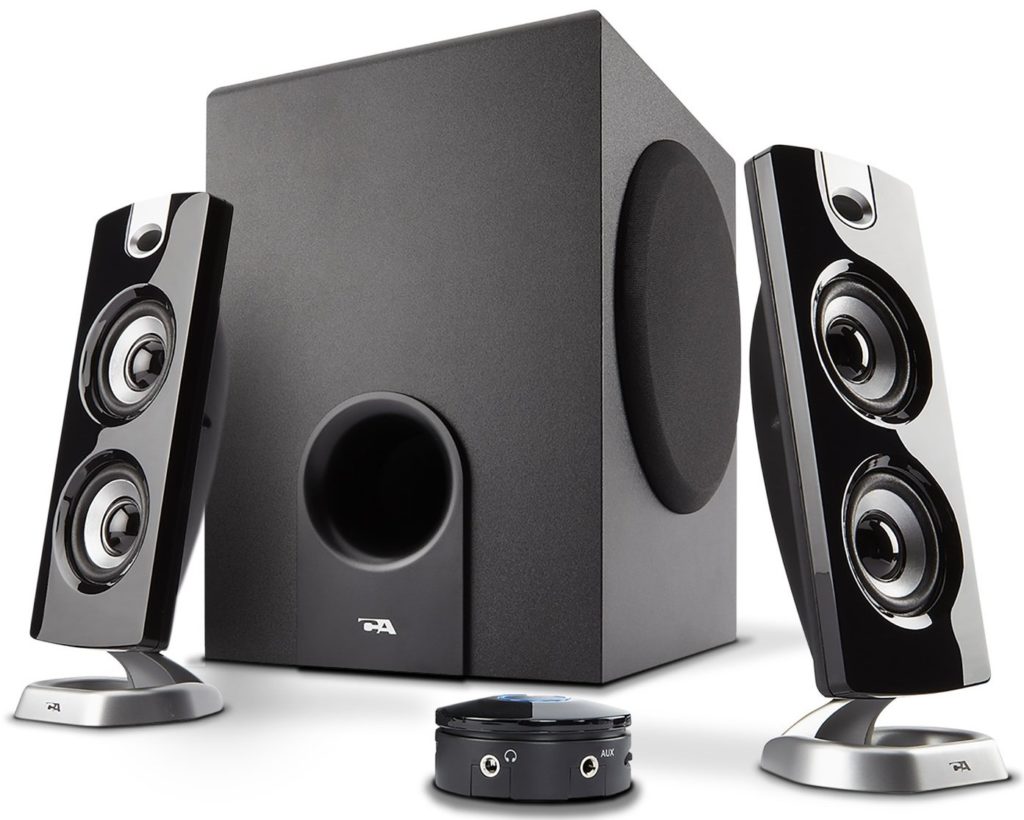
For instance, I had an Cyber Acoustics CA-3602FFP 2.1 Speaker Sound System with Subwoofer and Control Pod around without use after I upgraded some equipment100. I’m not going to disagree with anyone who says this is a total overkill for this project. This has a lot of power and a subwoofer. It greatly exceeds the sound needs for old arcades games. However, it was literally accumulating dust in a corner.
Cyber Acoustics CA-3602FFP 2.1 Speaker Sound System with Subwoofer and Control Pod
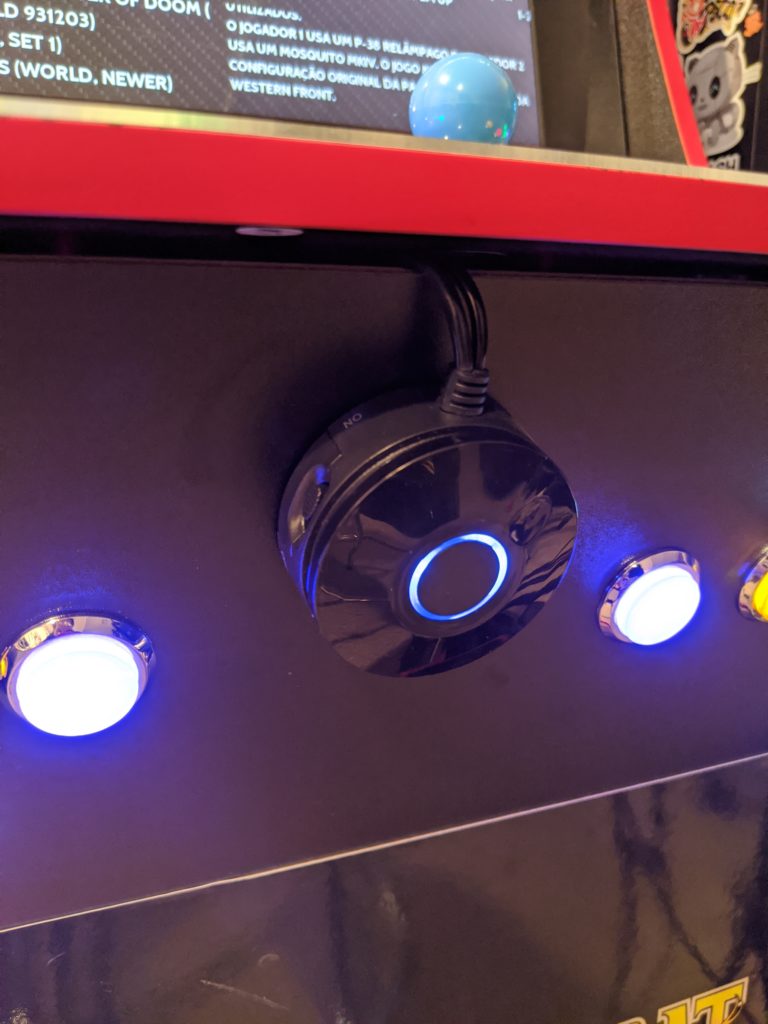
This thing also have this little control pod that is just perfect for this project. It controls the volume using a knob. I absolutely love control knobs. I could write a whole post about knobs. It has a round blue led which goes well with the whole arcade theme. On top of all that, the control pod also has a control for bass, an on/off switch, an auxiliary input and a phone output.
Volume control
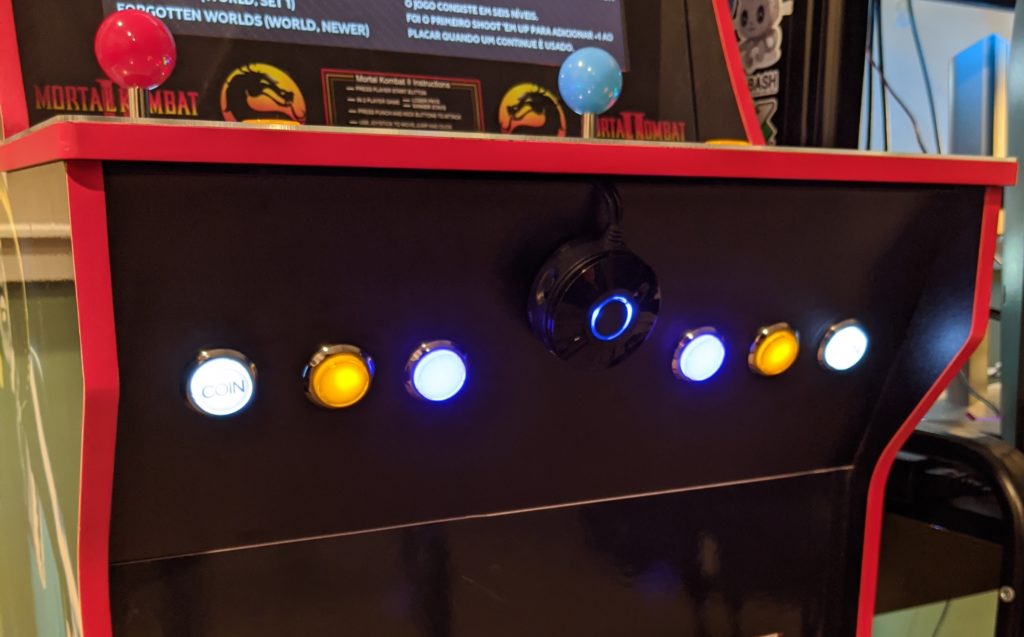
Because the wires fit in the gap between the panels no drilling was necessary. Inside the cabinet I just put the subwoofer an the two speakers. I used a double-sided mounting tape to put it in place.
The little blue circle light.
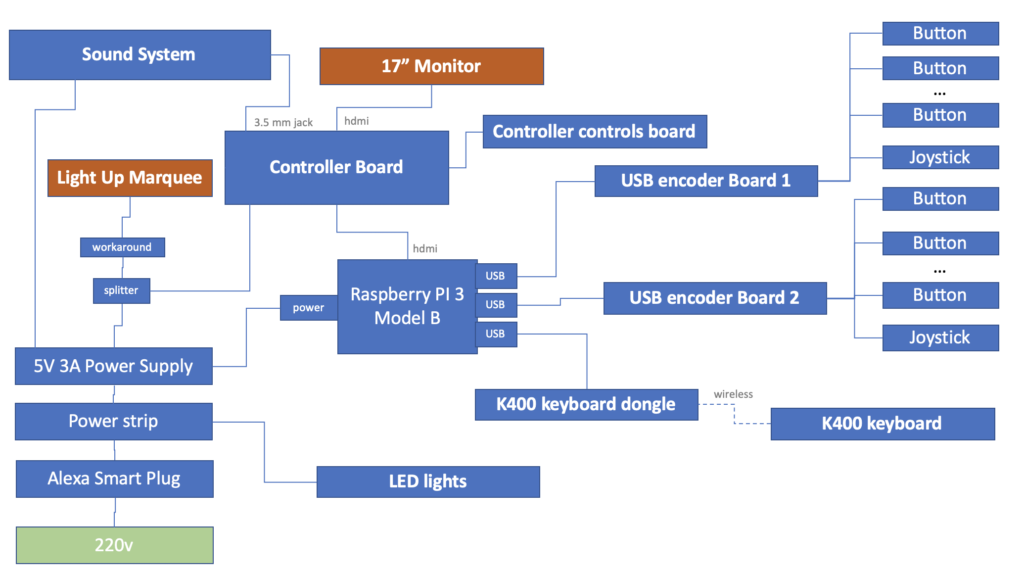
For the sound input I used the sound output from the control board. That is already converting the HDMI sound output. Another solution would be to plug it directly into the Raspberry PI and configure it to output the sound there instead of sending it via HDMI.
Control board to speakers
Lights
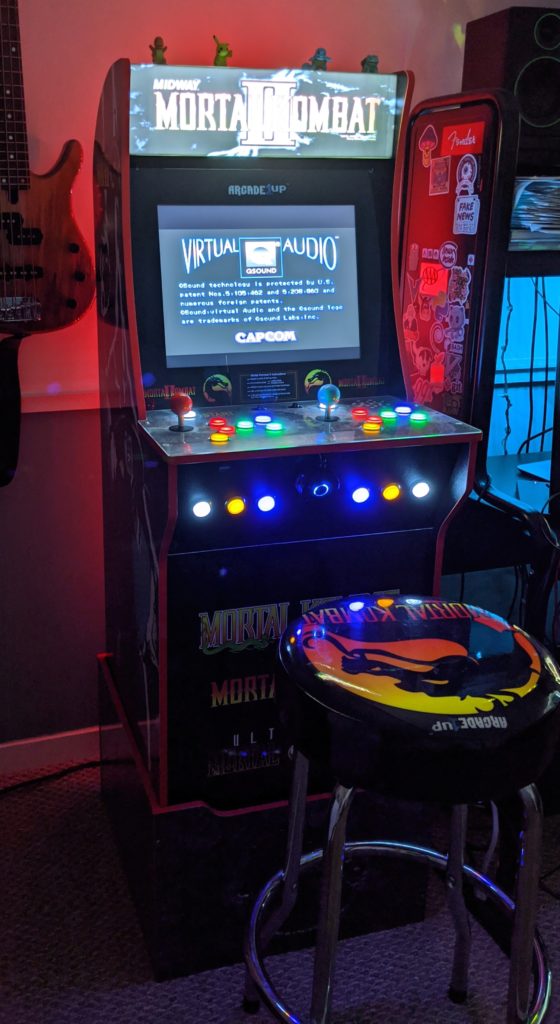
The last thing I added was just some LED strip lights in the back of the machine. It’s just some led multicolor strip lights that I bough a while ago for around 5 bucks. I just let it set to red because it goes well with the vinyl strip it came with.
Really ties the room together.
That’s probably the simplest and cheapest of all the modifications but really adds some ambiance around the cabinet.
Because the lights and everything else are in the same power strip that is behind the same Amazon Smart Plug when I say “alexa turn the arcade on” everything lights up with a lot of colors.
Conclusion
This has been a long and fun project. I have been incrementallychanging parts and adding modifications. It’s slow and it’s not a single weekend project. It’s good to spend time on each iteration and getting a felling of what needs to be improved. There is still some room for a few more lights and maybe a beer holder. Other than that the next changes should be on software.
I decided to add a second control deck to this cabinet using the wood panel that already came with the original machine. My initial plan was to add 4 more buttons so each player would have 2 extra buttons for games that requires a lot of buttons.
Prototyping
Before committing to a layout and irreversible woodworking I build a crude but functional prototype out of cardboard.
Cardboard prototype
The prototype was important to realize this was not the layout I wanted. I wanted more buttons. The original control deck has 7 buttons for each of the 2 players. Usually this would be enough but you have to use one of them to the start button and another for coin button. You also need a special button to exit the emulator. That’s 3 out of 7 buttons. Only 4 left for the core gameplay itself. Because this machine should be generic for many types of games I decided to add 3 more buttons for each player so each player has a total of 10 buttons.
The cardboard prototype is an optional step but it was easy and quick to do, it’s fully functional, and provided me some insights for the next steps. I used a piece of cardboard and put the panel J to trace a copy over it using a pencil. Then I cut the cardboard using a craft knife and also cut holes for the buttons. I installed it i the buttons, put the cardboard in the same place of the Panel J, put the wires, and configured the software. I could use the machine like this for some weeks before I moved to the next phase.
Layout
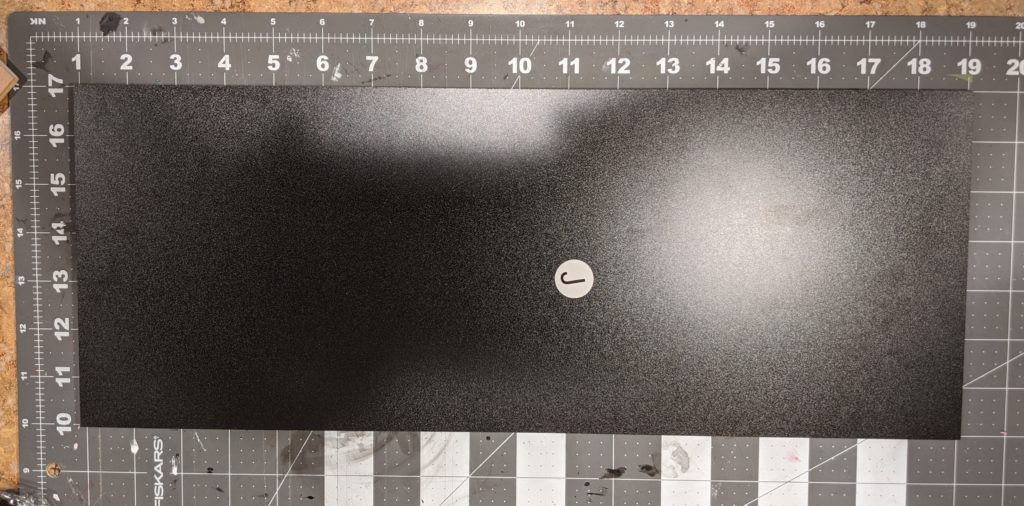
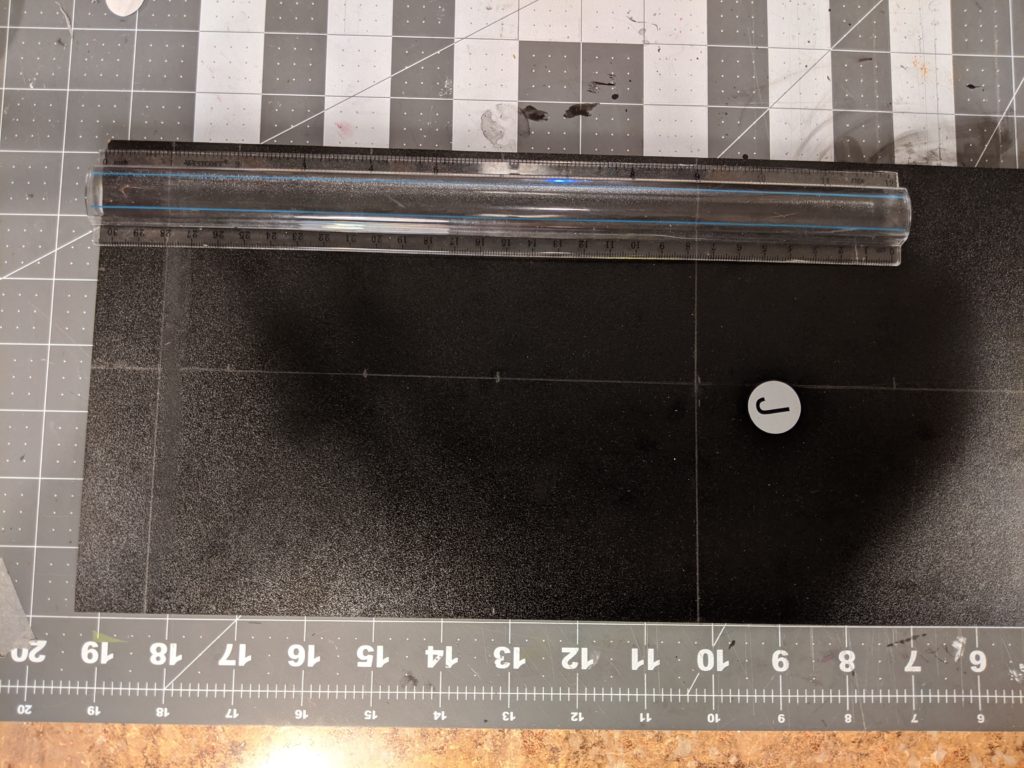
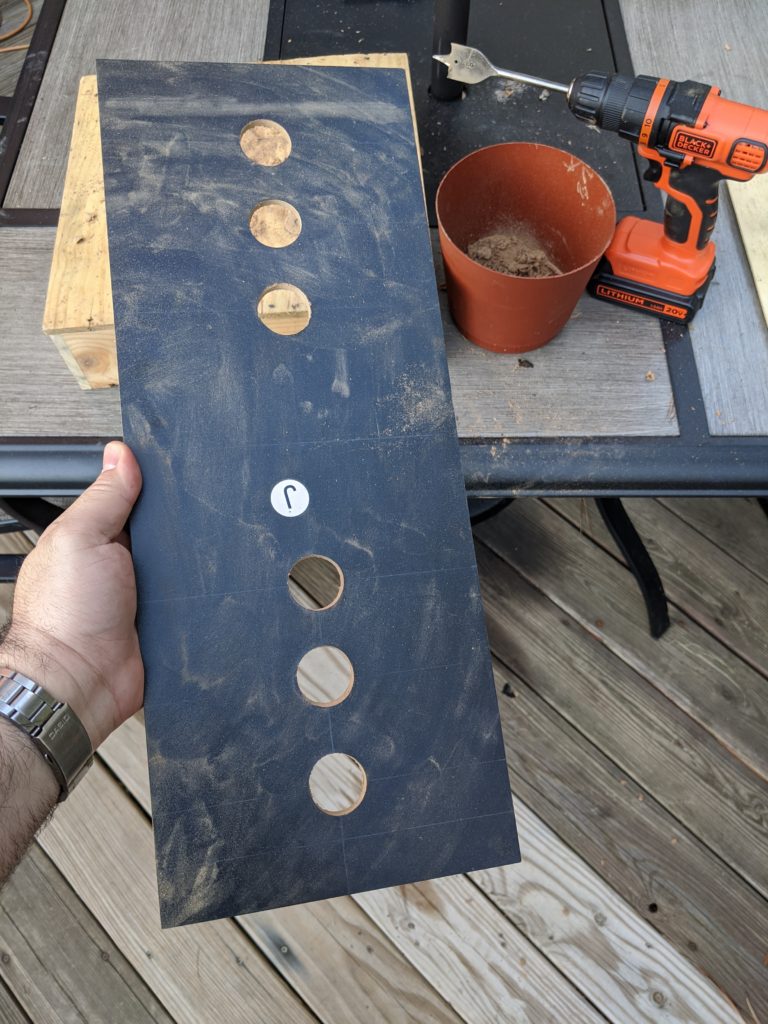
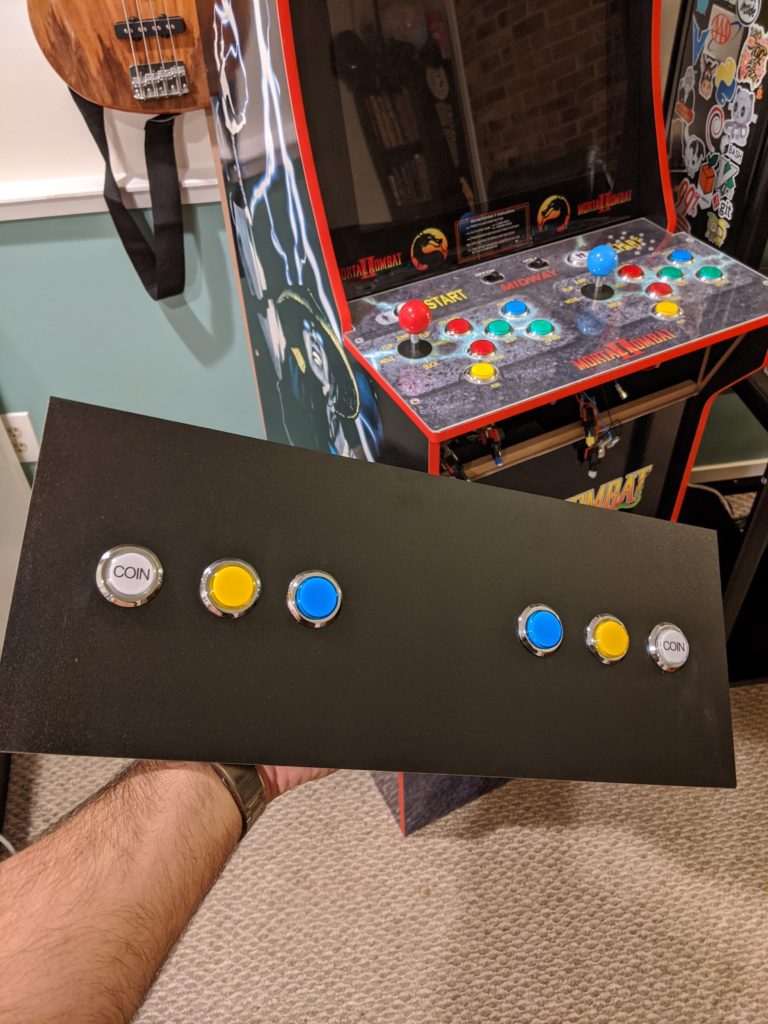
I don’t have a lot of experience with wood so this was my attempt. I had this piece of black coated plywood (45.72 x 17.78 cm ~ 18 x 7 inches) and I wanted to put 6 arcade buttons on it.
46 cm x 18 cm (18 inches x 7 inches)
First I needed a layout for the buttons. By using the prototype for a while I wanted the buttons in the middle of the panel. Some margin from the sides. Some space in the middle for some future project. The method I used to make the lines using a mechanical paper and a rule is the following:
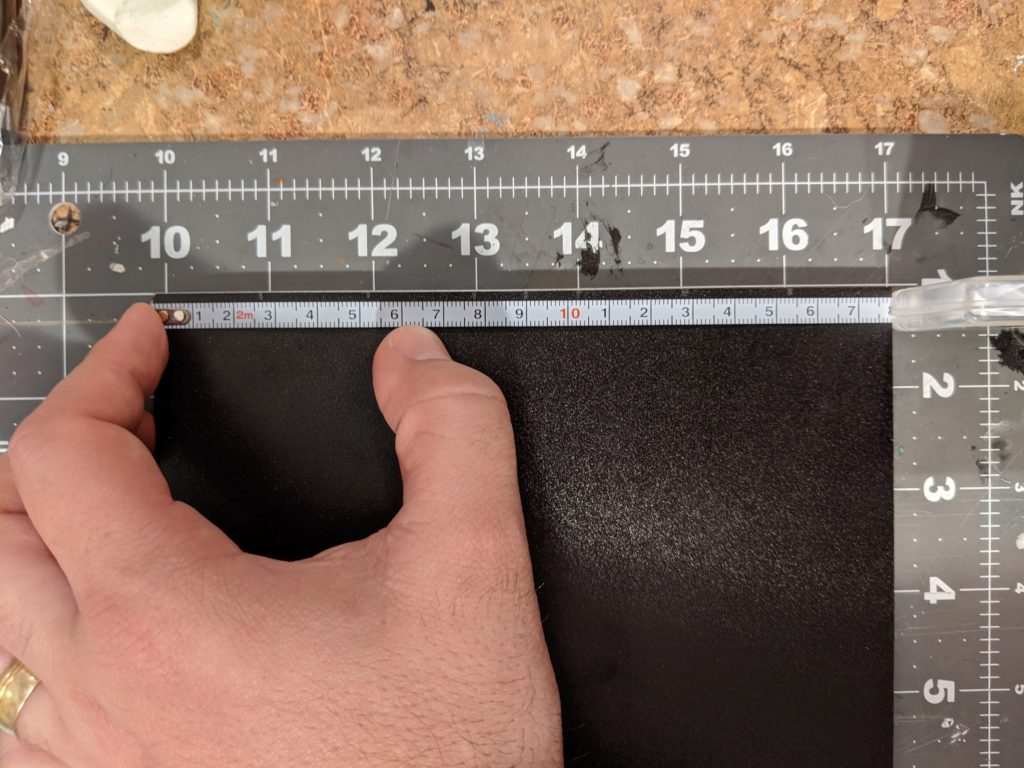
First, I measure the number I want on one side. Here, I wanted a straight line in the middle of the panel. I get the height of the panel (7 inches ~ 17.78 cm) divide it by 2 (3 ½ inches ~ 8.89 cm) and mark it down using a mechanical pencil.
Second, I do the same thing in the opposite side of the panel.
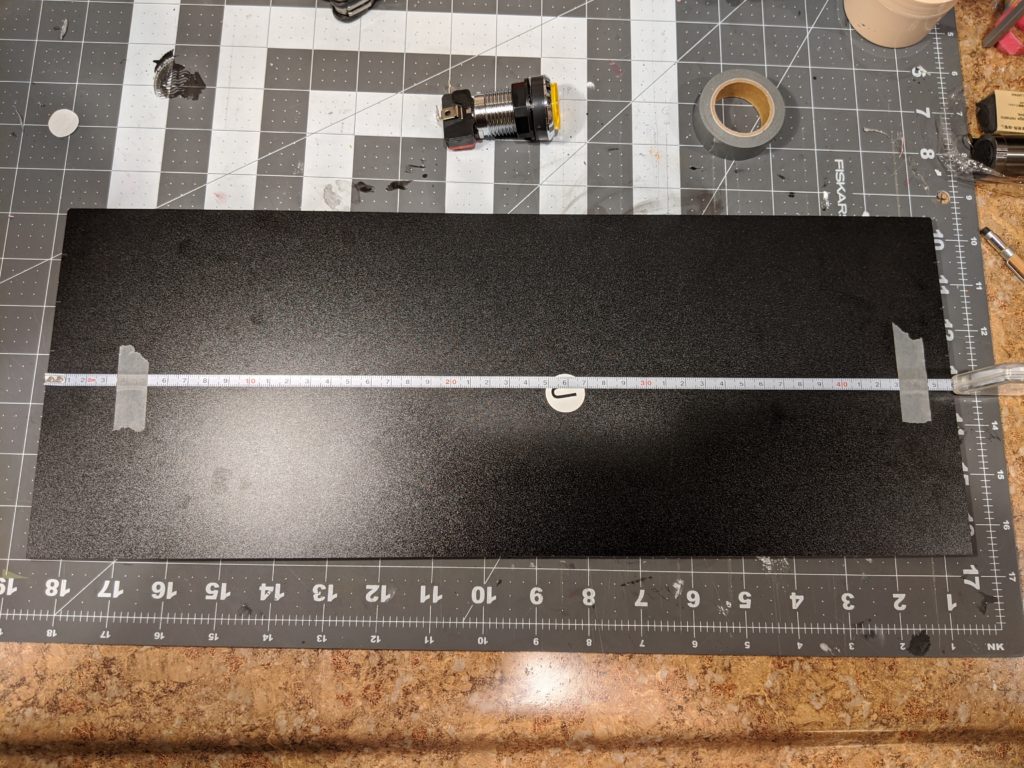
Third, I trace a line between those two points. As I don’t have a rule long enough for this line I used a metal tape measure. Any long straight object will do.
Because I was using a tape measure I used tape to fix it on both side before making the line.
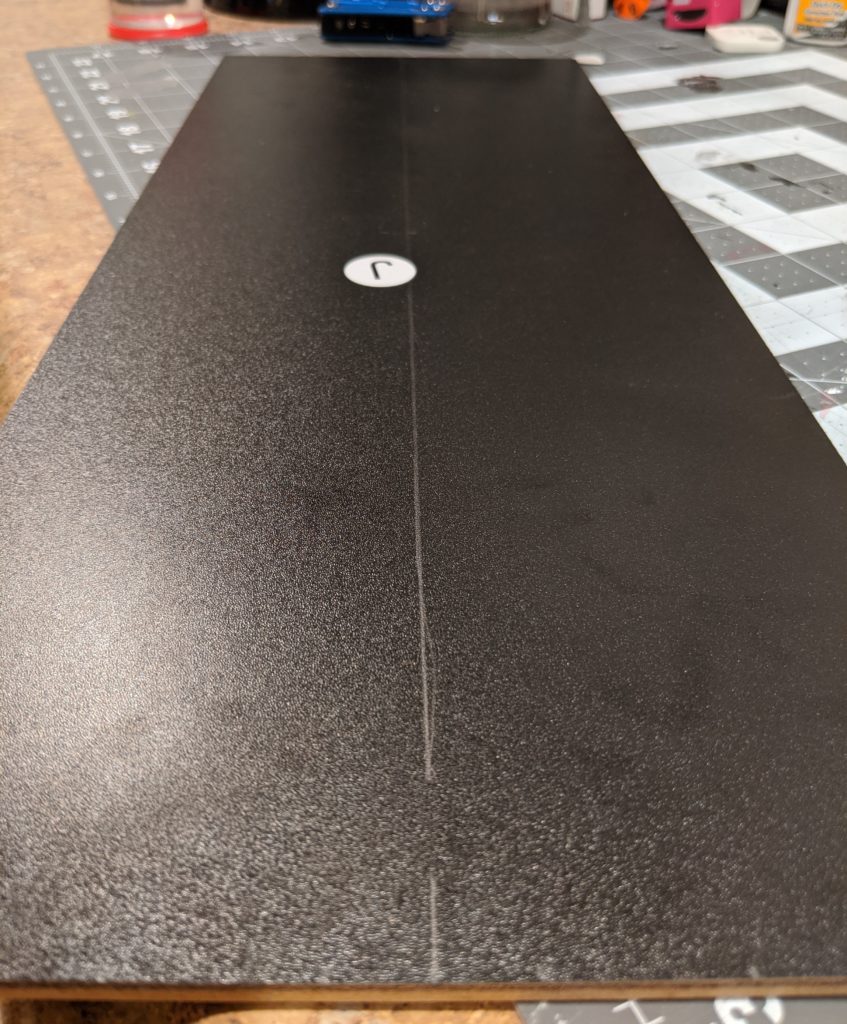
Now repeating this process I got a perpendicular line in the middle of the panel. Then other 2 lines each 1 each away from the border.
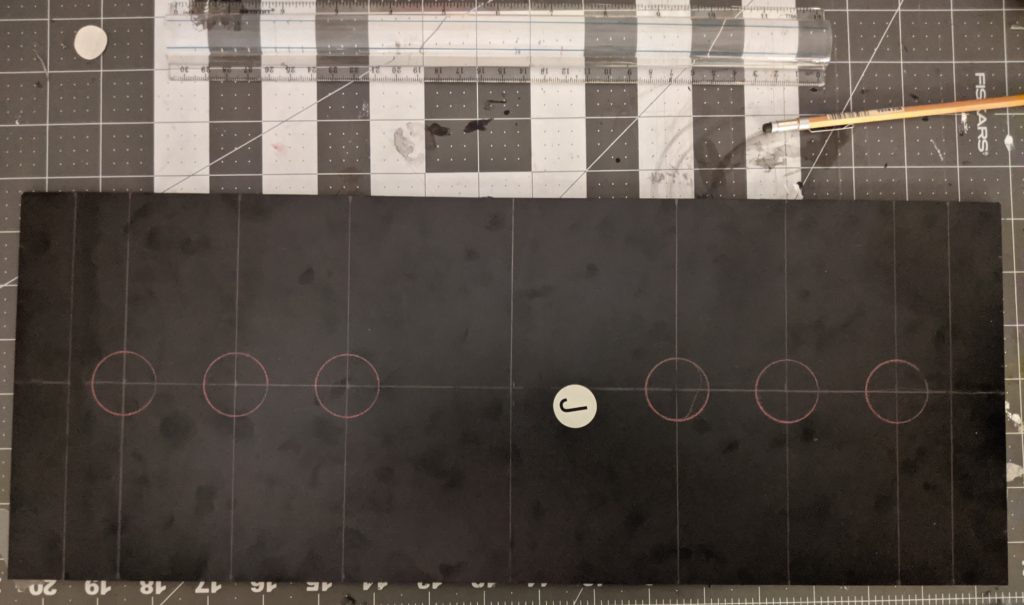
Then I did moved another 1 inch to mark where the first button was going to be. This way the first button center is 2 inches away from the border. From this center I moved 2 more inches to find the next center. And then did the same for third center. I repeated the same process for the second player.
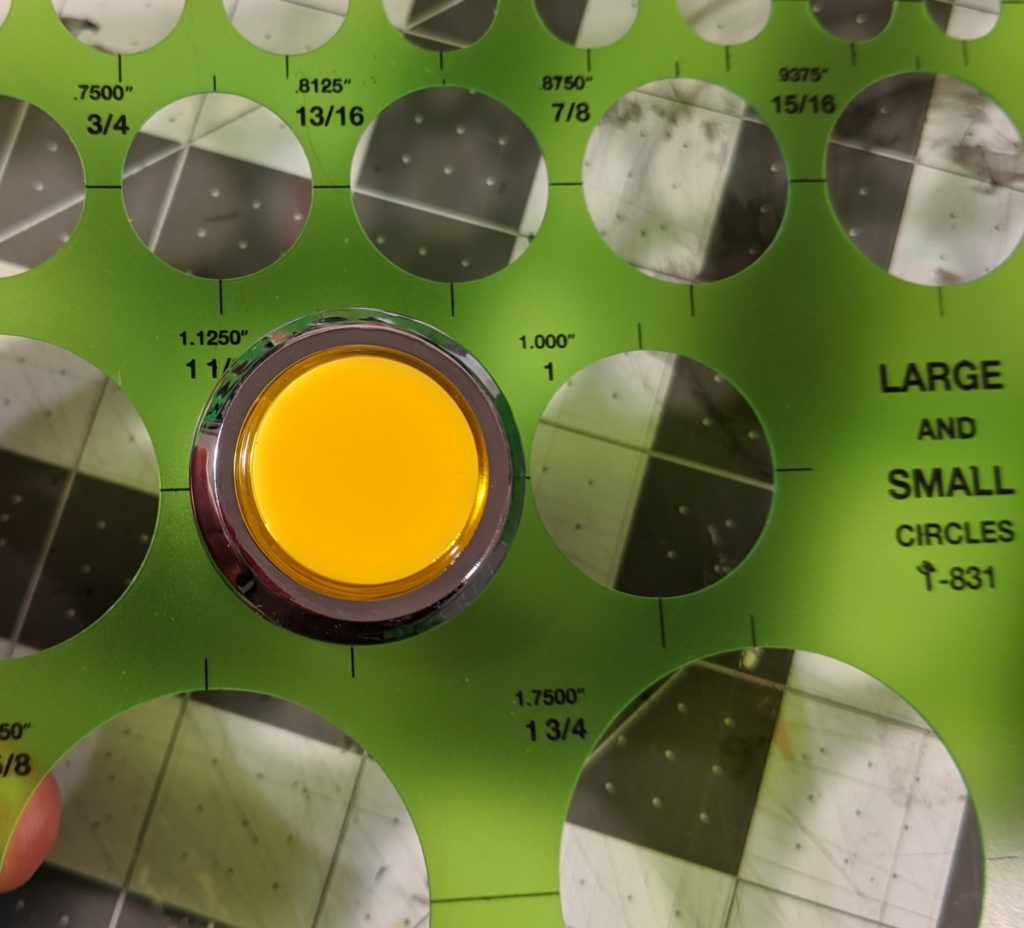
I happen to have this circles template that is very handy here. The circle I need is 1 â…› ” (2.8575 cm) and I could use the template to test if the button fits before committing to the whole size. It fits perfectly. This is the same whole size for the other buttons in this Arcade1Up.
Using red graphite and the circles template I made the circles where the buttons would be. This step is not really necessary but I wanted to be sure this looks okay before doing the holes.
Woodworking
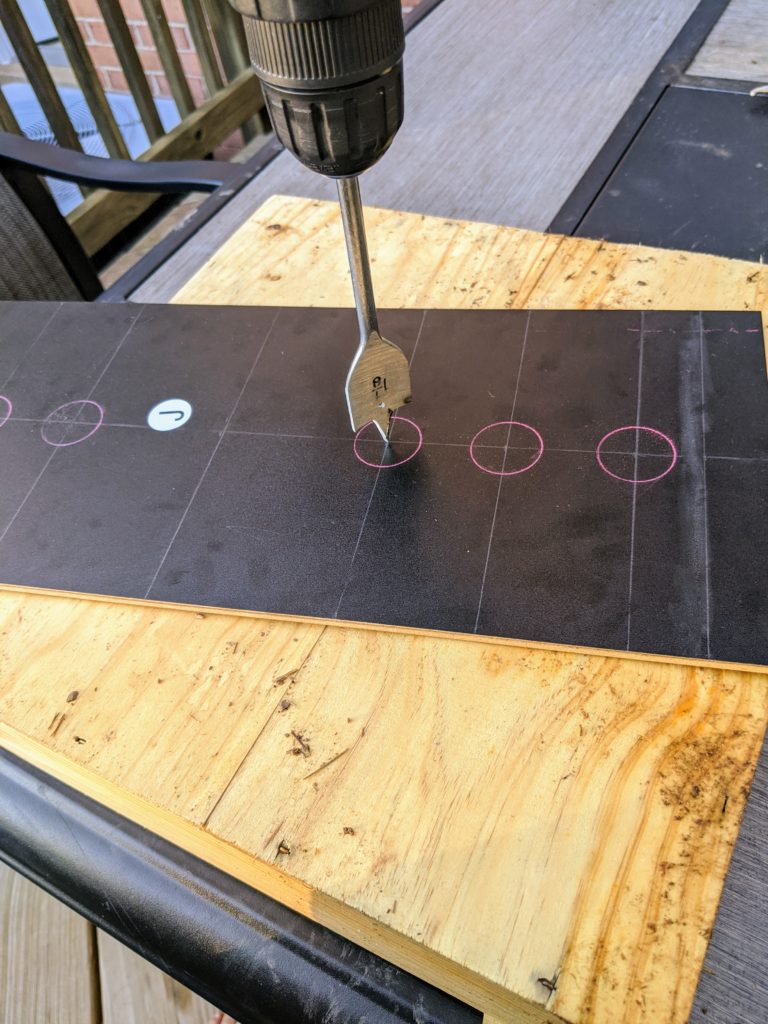
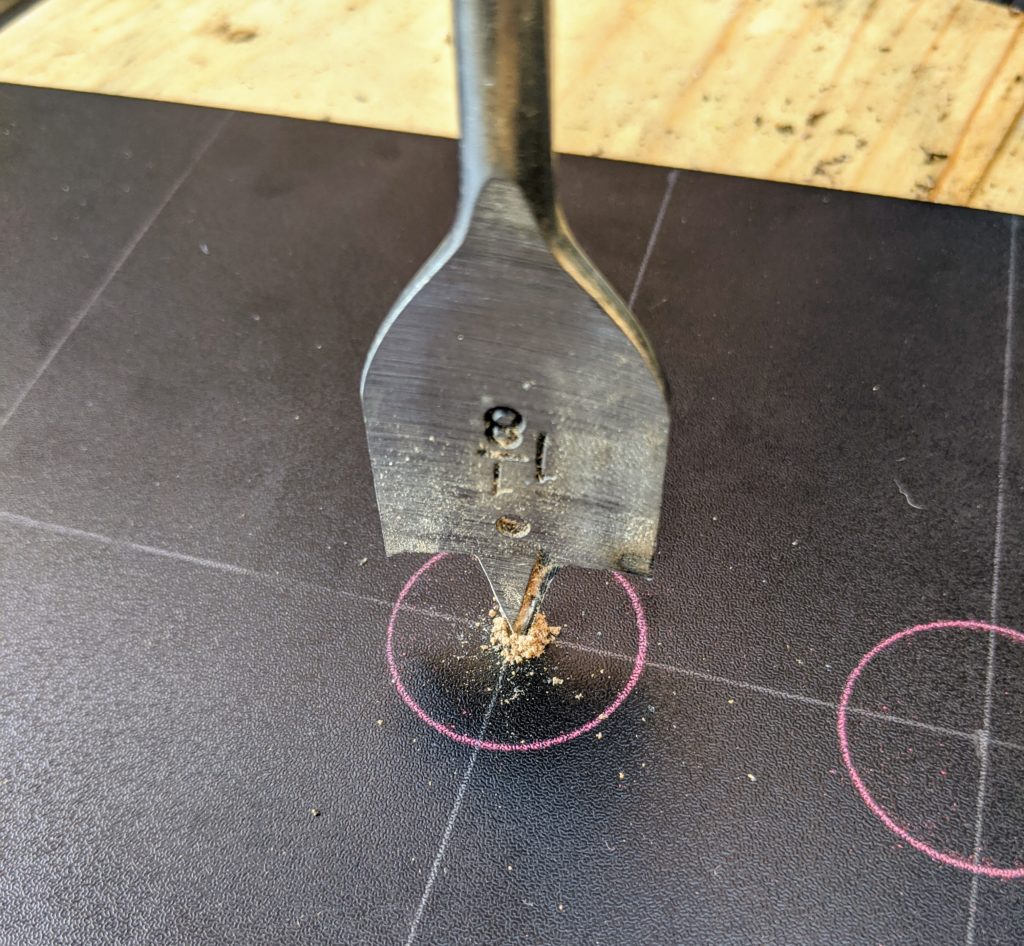
I put a old piece of wood bellow the panel I’m going to drill. This way when I go over the panel I will not hit the table. I’m using a 1 â…› ” spade drill from this drill bit set and a Black & Decker LD120VA drill.
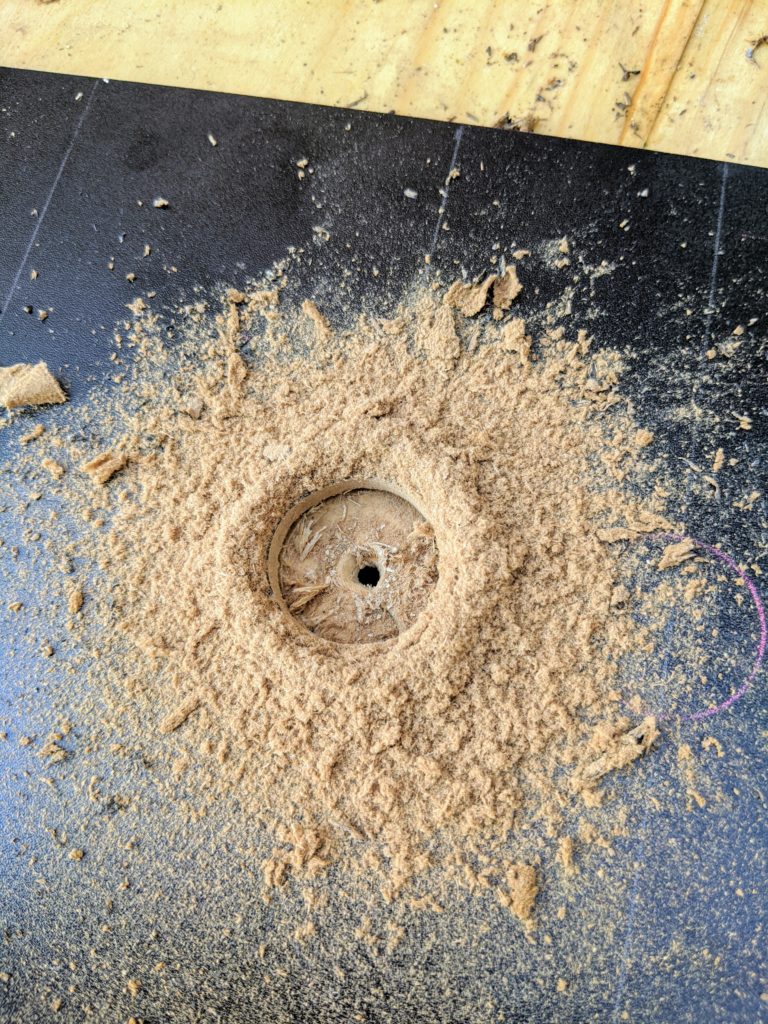
Point of no return on this project.Oh, there is a lot of sawdust. Better do this outside.6 buttons. 6 holes.
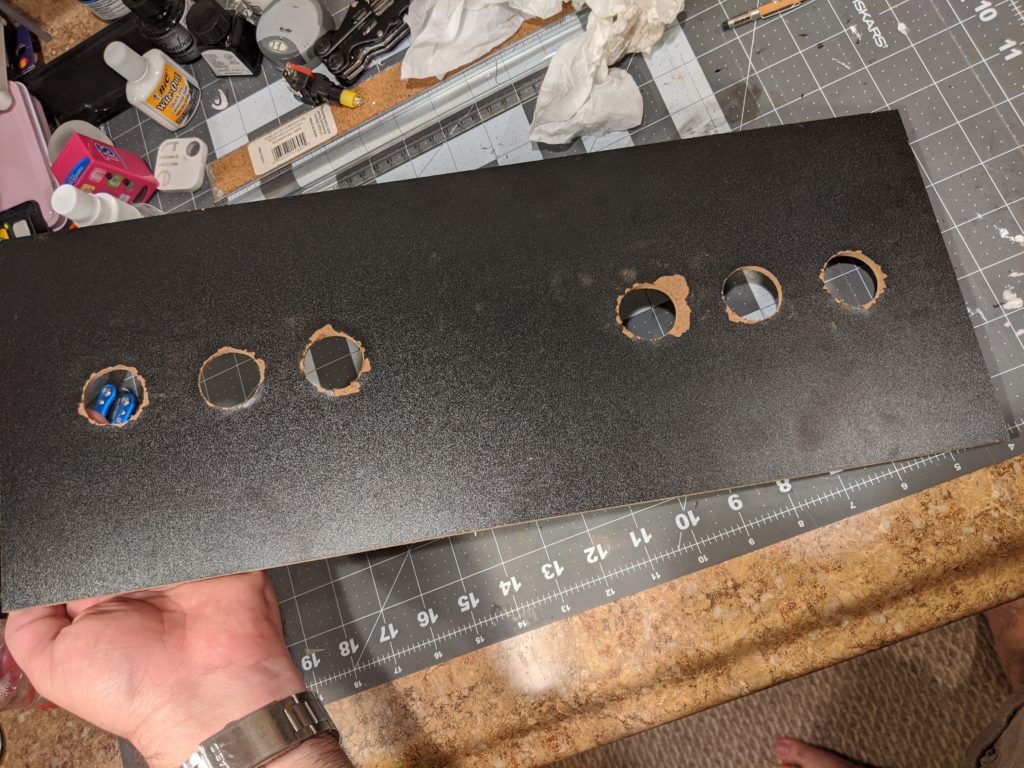
On one side the wholes where clean but in the other side there were these ugly “exit wounds”. As I said, I don’t have a lot of experience with wood. Fortunately this board is the same both sides and I could just clean the side that was supposed to be hidden and use as a front panel.
How could I have avoided this?
Buttons
Buttons installation is just like it was on part 2. In total I could use all the buttons that came with the kit.
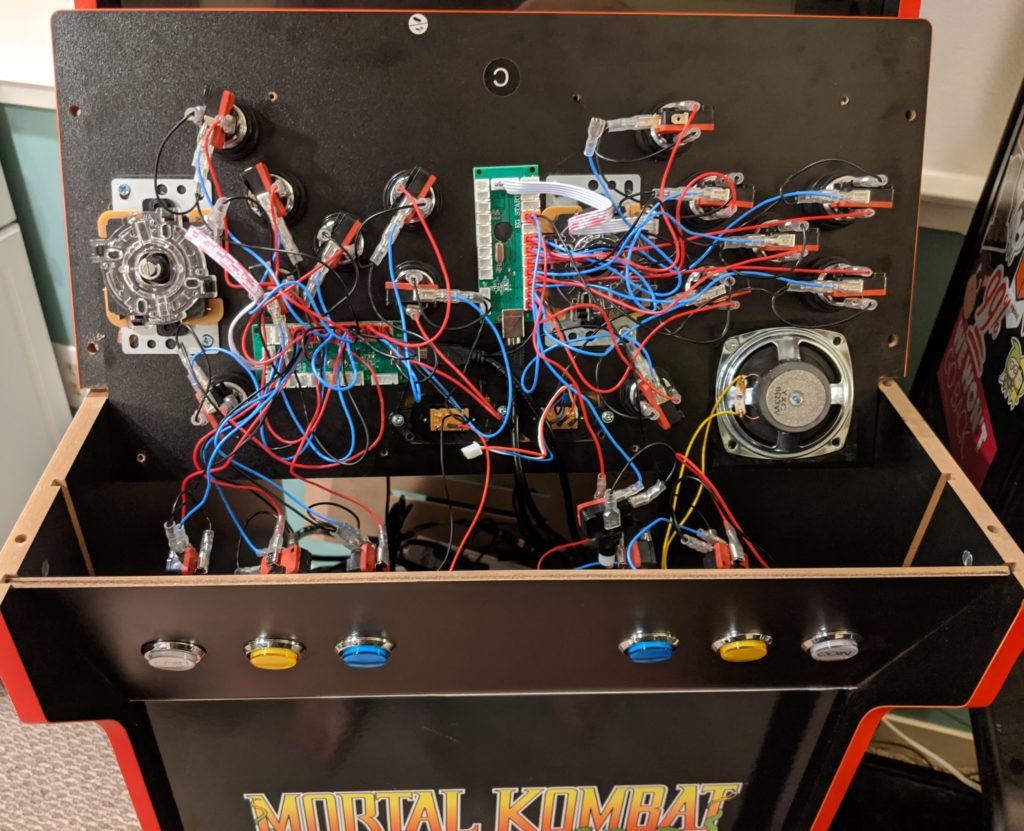
6 more buttons
They are close enough from the control board so the wires can reach the connectors. Here I’m glad I did the cardboard prototype because I knew I didn’t need to extend these wires.
No cable management.
As far as configurations go it is the same as in part 2. These buttons behave just like any of the other buttons. For the Raspberry PI this is a computer with two USB joysticks plugged on it. Each with 10 buttons and the directional which is the same as another 4 buttons.
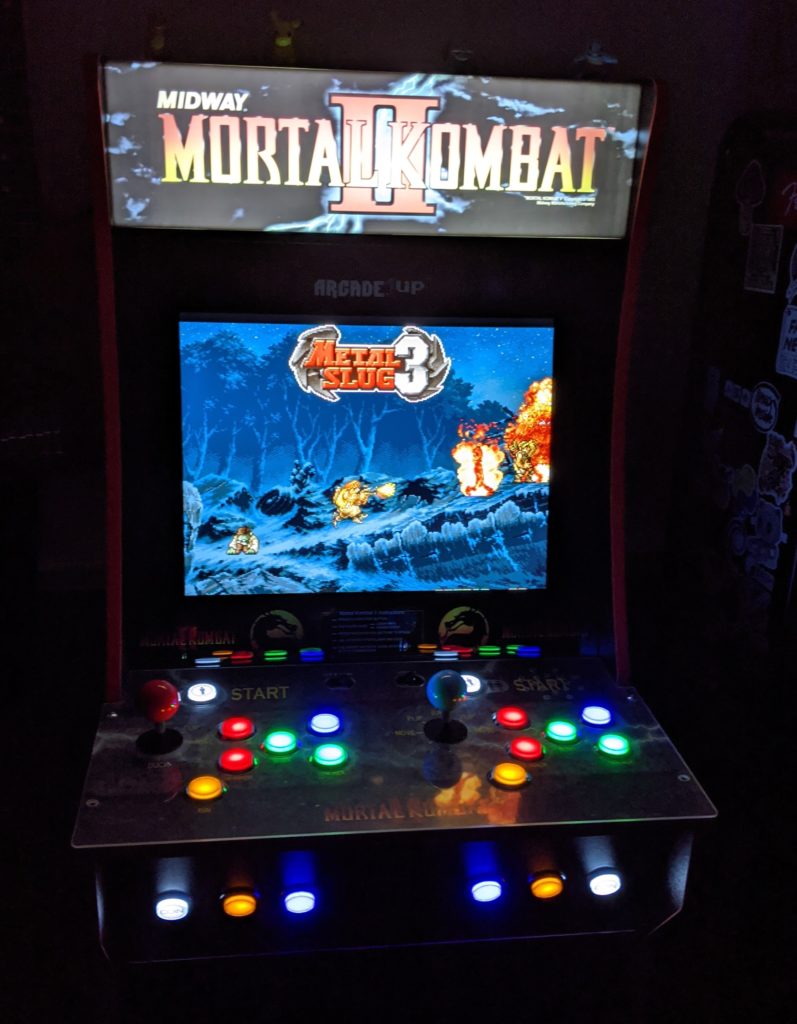
Everything lit.
Conclusion
Now this machine has two joysticks and 20 buttons and 2 joysticks. That is enough to play all the games I want. On the next part of this tutorial I will show how to add better sound and even more lights.
What I’m showing here was done with an Arcade1UP Mortal Kombat but should work for other models with little changes. One of the reasons I choose the Mortal Kombat cabinet was because the number of buttons and their layout.
It’s worth noticing that you don’t necessarily need all these parts or these parts in specific. These were the ones I used and most of them were not bought specifically for this project and I could use them because I had around.
Replacing the joysticks and buttons
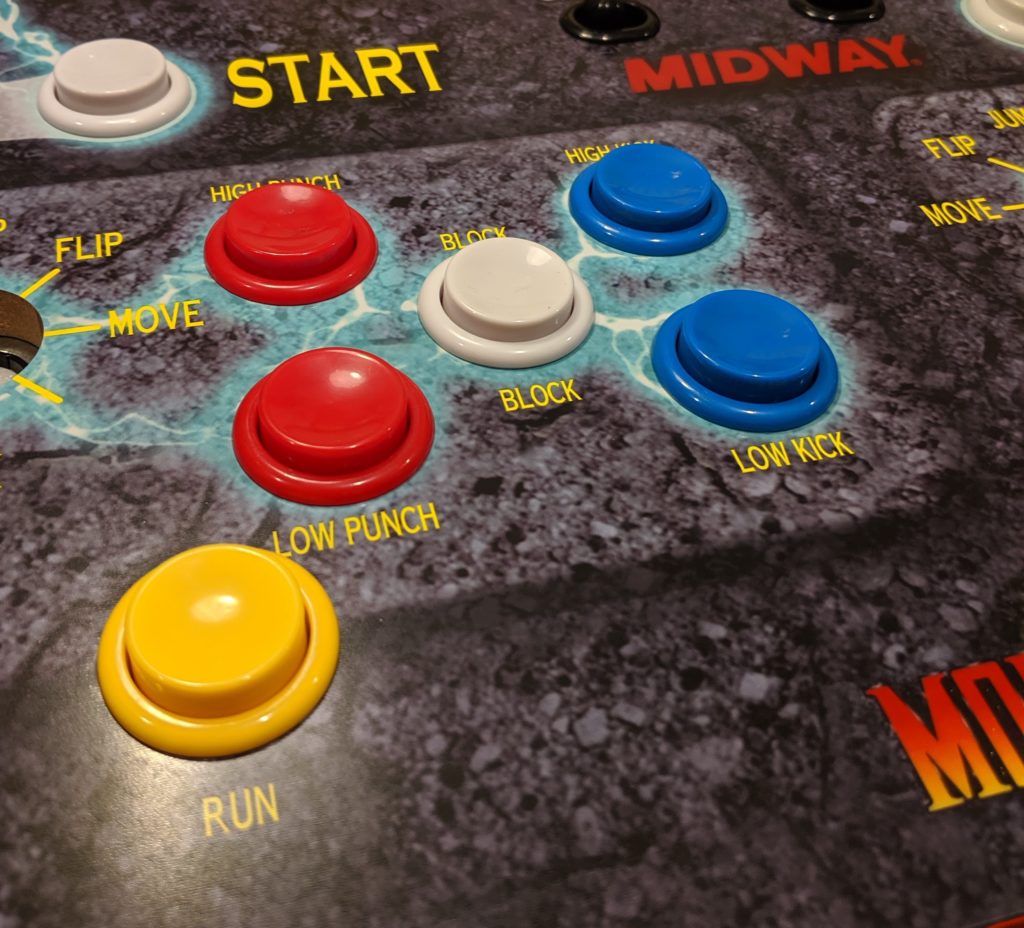
The original buttons on my MK Arcade1Up were a bit ugly and quiet. I want something more flashy and more clickly. I went with this kit on eBay that comes with 20 buttons, joysticks and encoders. The buttons have a LED inside and a round plastic chrome ring around them. They also come with everything necessary to replace the original buttons and they fit in the same 1 â…› ” (2.8575 cm) hole.
Old buttons.New buttons
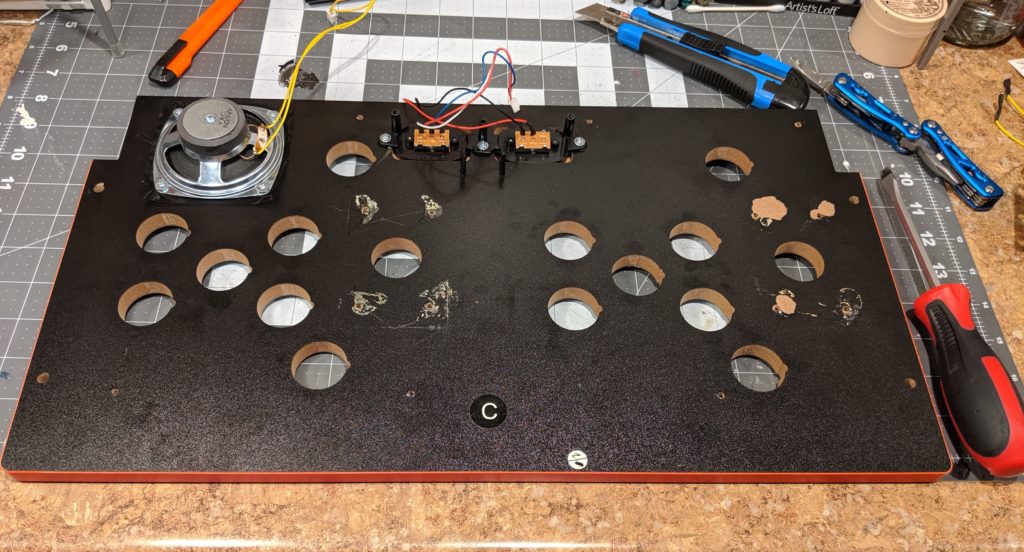
Step 1. Remove the control deck from the cabinet.
Control deck detached from cabinet
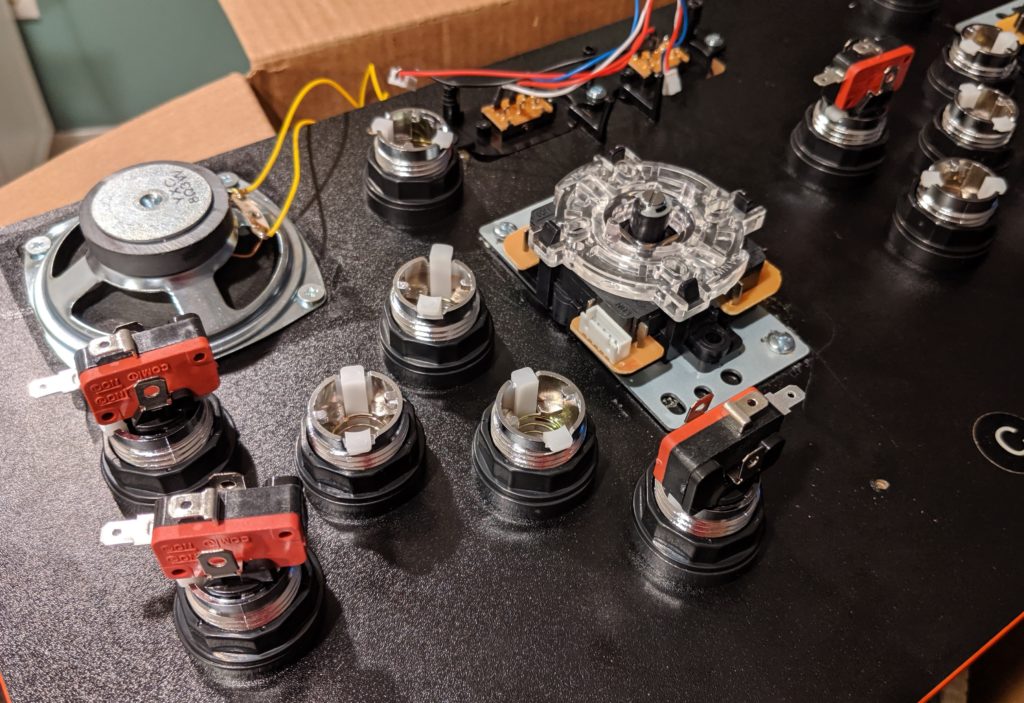
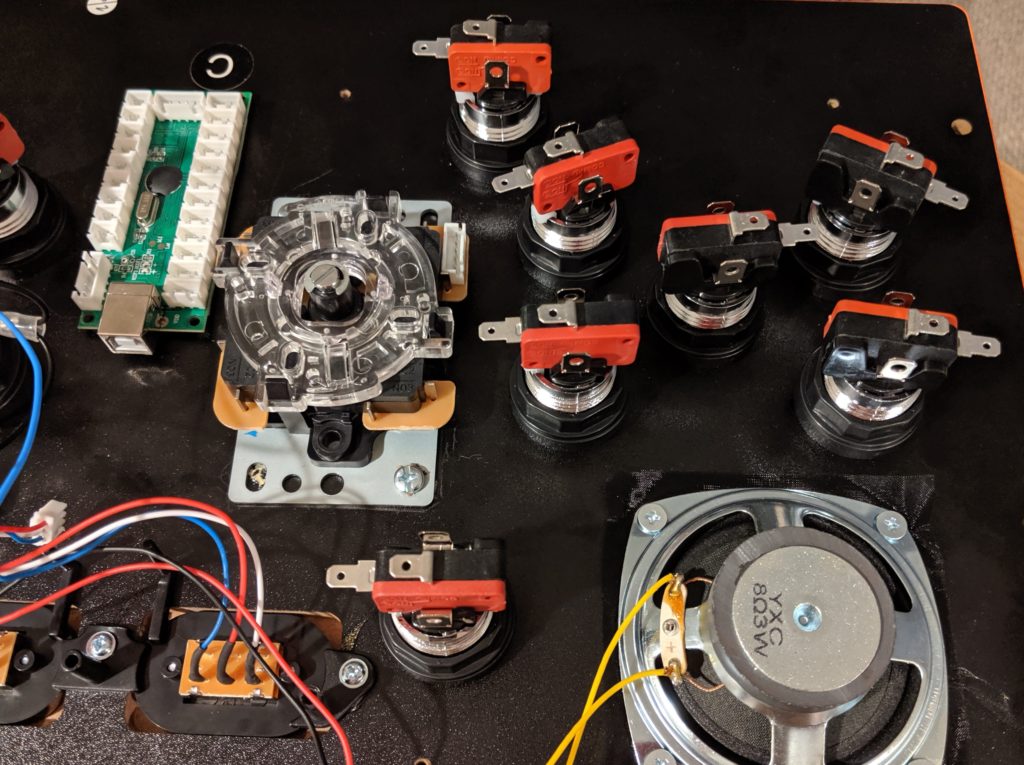
Step 2. Remove the protective black plastic case exposing the wires and circuit boards from the control deck.
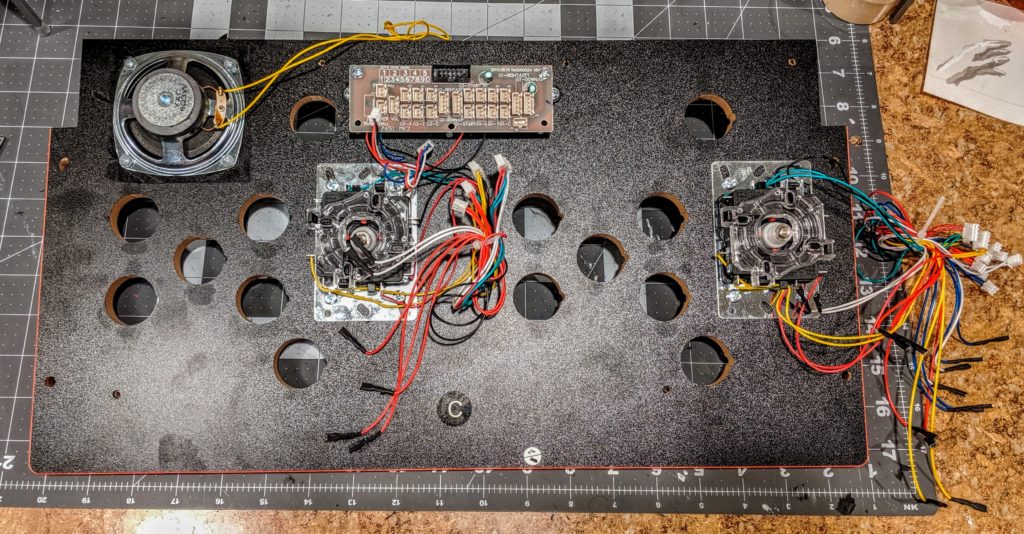
Control deck with protection case removedOriginal control deck components
Step 3. Remove all the wires.
Wires removed
Step 4. Remove the buttons. They are a single piece. You just have to press them in their opposite bulges and they will fit to leave the hole in the front panel.
Press…… and push.Old buttons removed
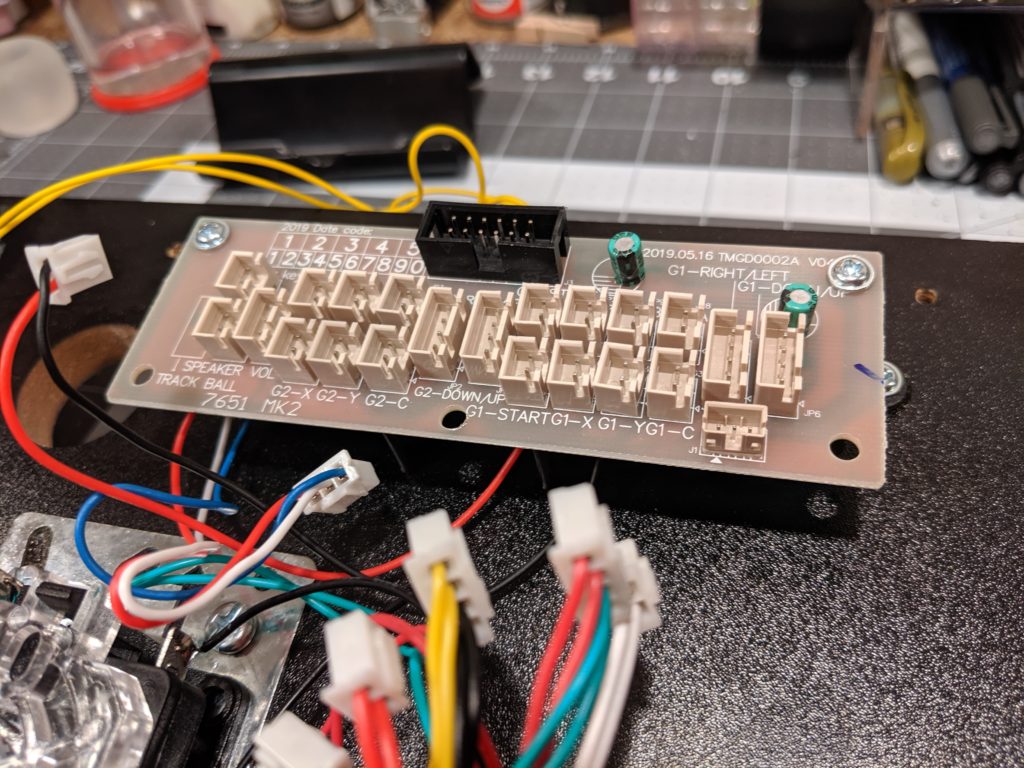
Step 5. Remove the controller board. Just unscrew it and remove it.
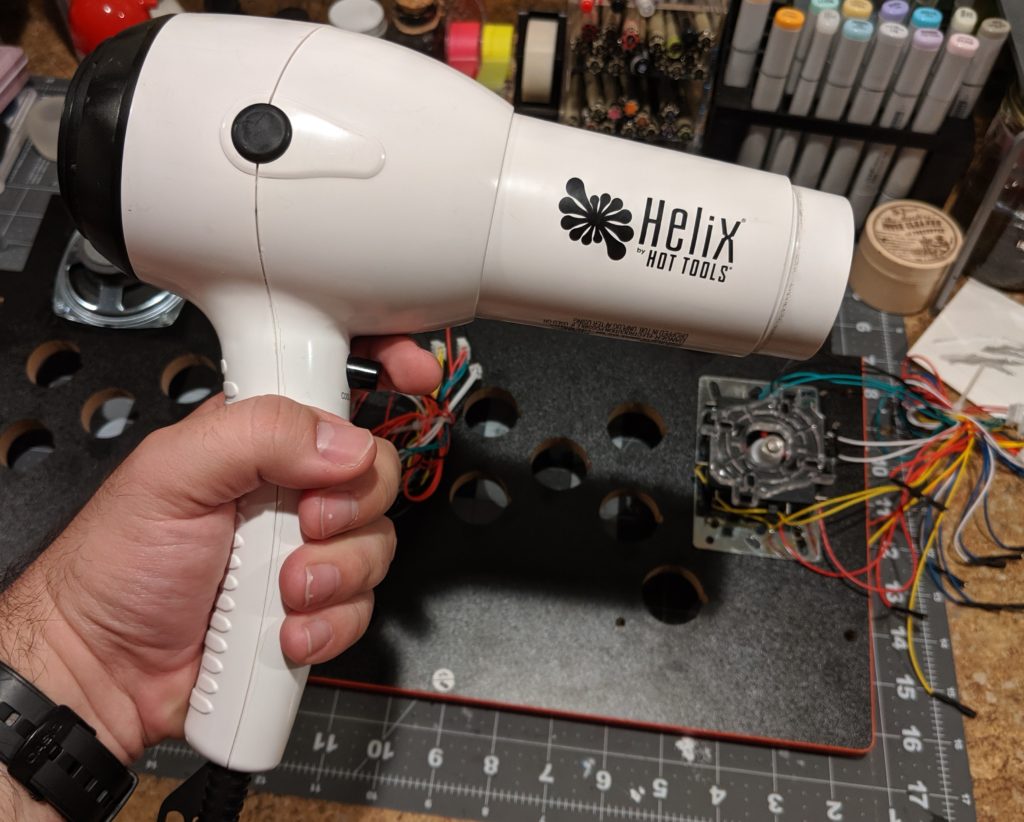
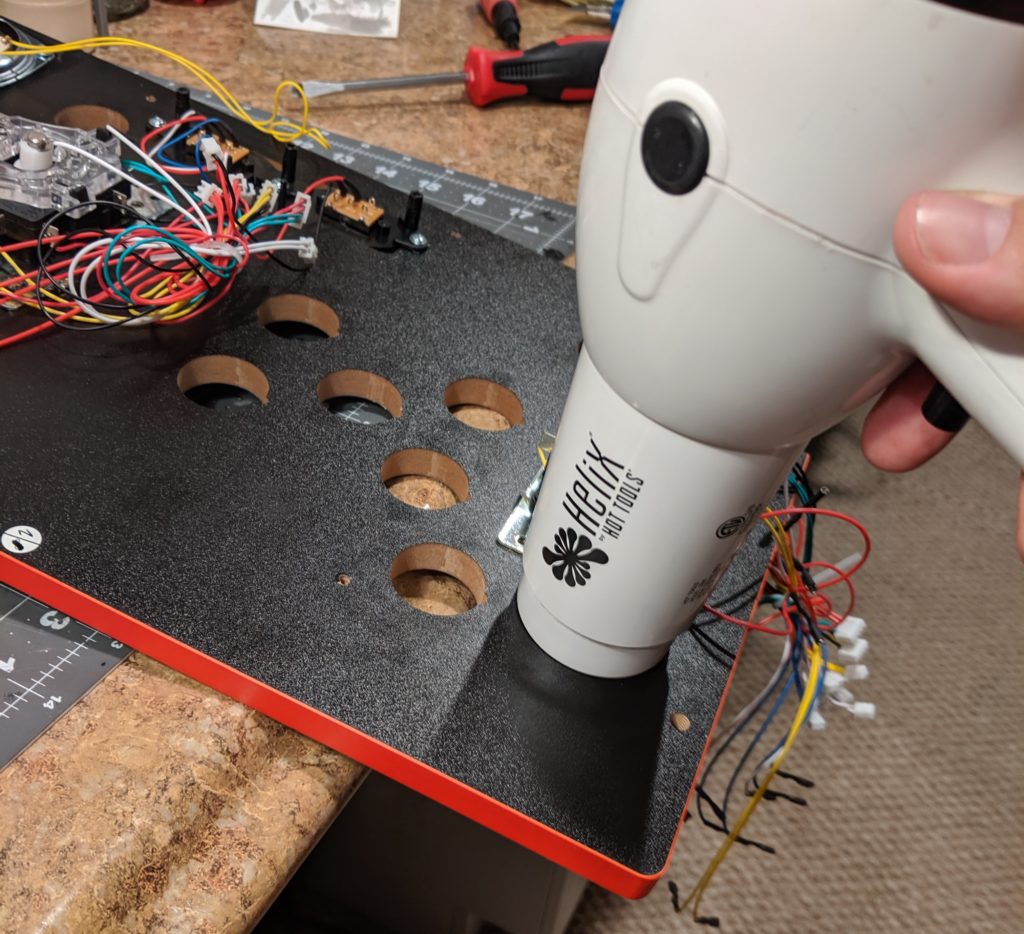
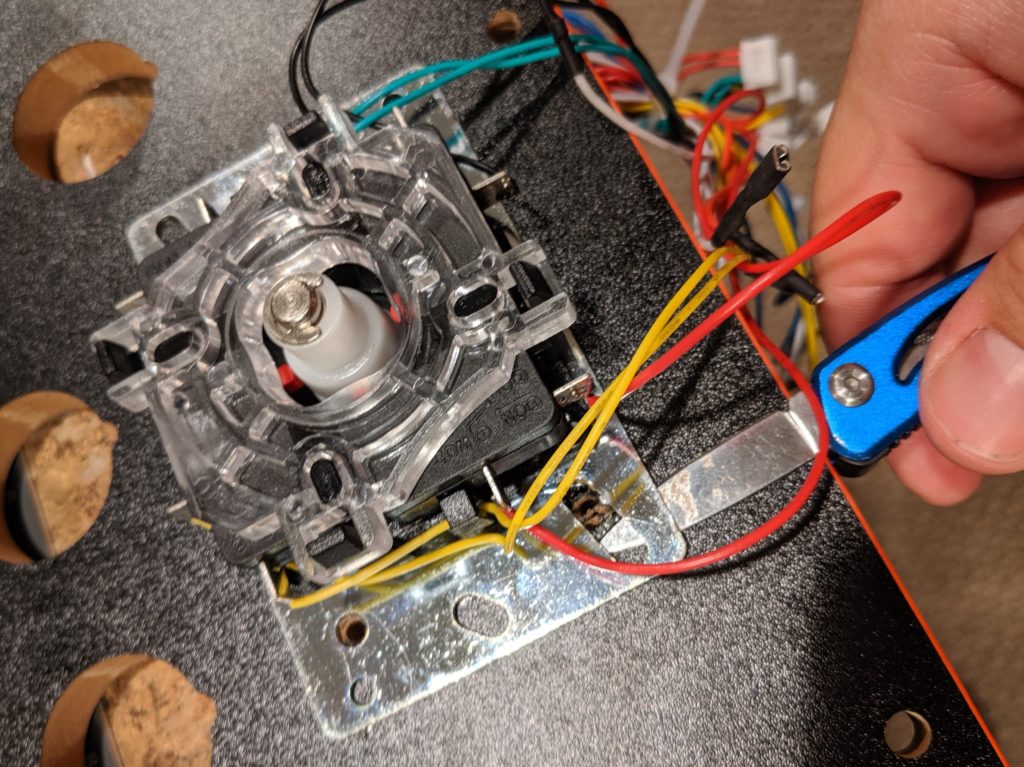
Step 6. Remove the old joysticks. First unscrew the bat top of both joysticks. Remove the screws that connect the metal plate to the board. The metal place is also glued to the board. You need to melt the glue a little so you can pry out these panels out. Here you can use a heat gun or a hair drier.
Blow some hot air directly in the metal panel. The smell of the carcinogenic fumes you are breathing means the glue is now melting.
I would recommend this step in a well ventilated area.
Use a knife or a screwdriver to pry out the metal plate. You can heat a little and pry a little until the whole plate is out.
Melt the glue and pry it out.
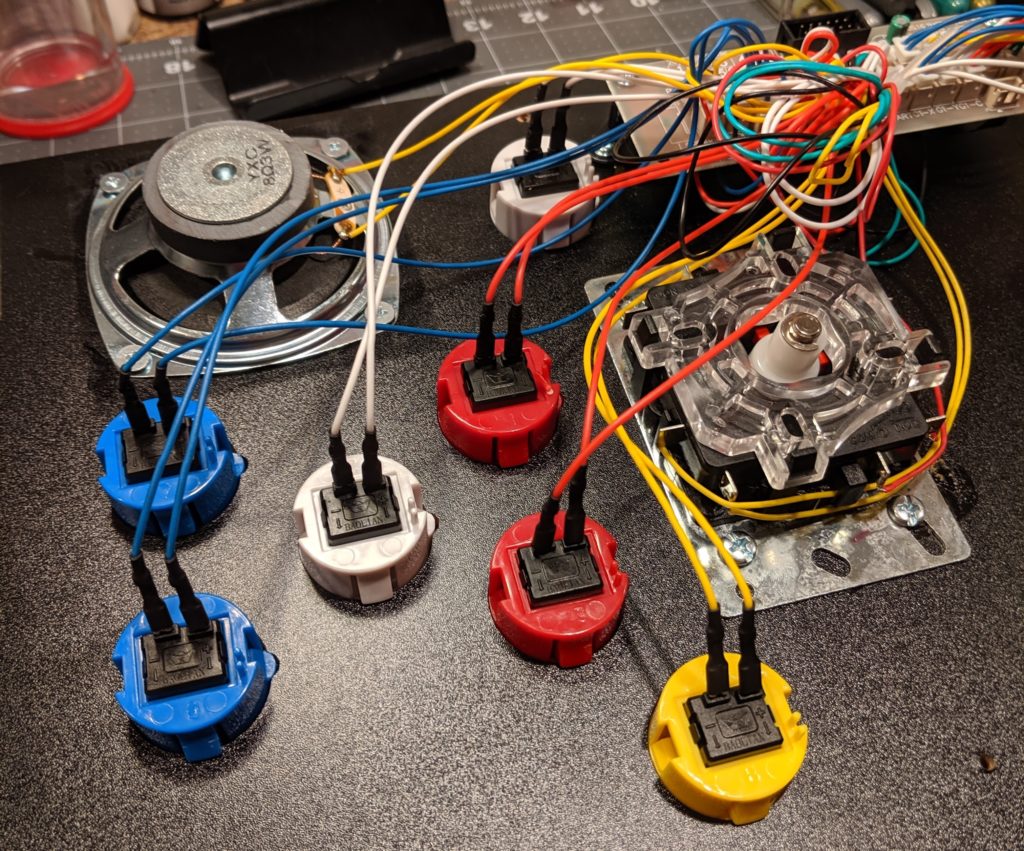
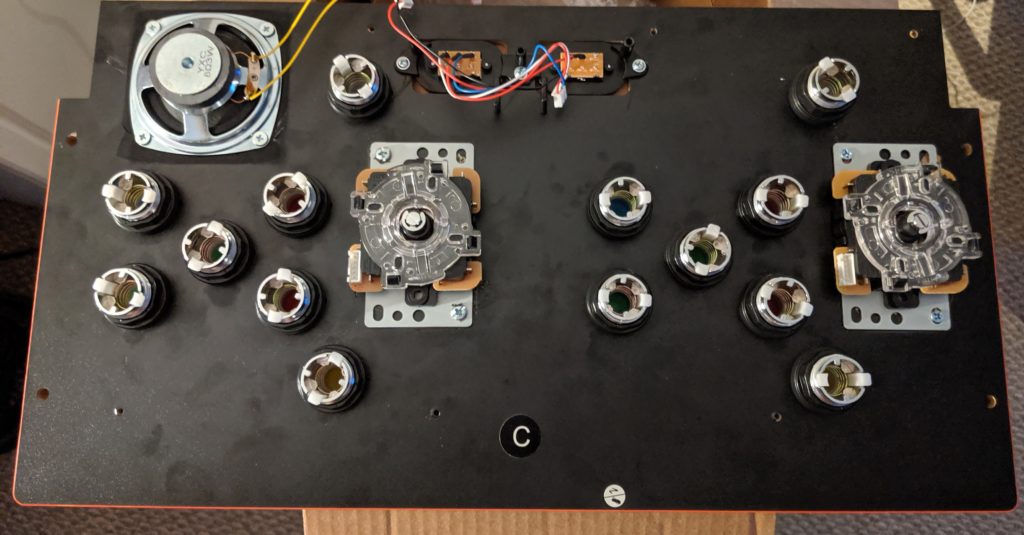
For now I’m not removing the speaker and switches.
Control deck after I removed the buttons and joysticks.Everything I removed from the control deck so far.
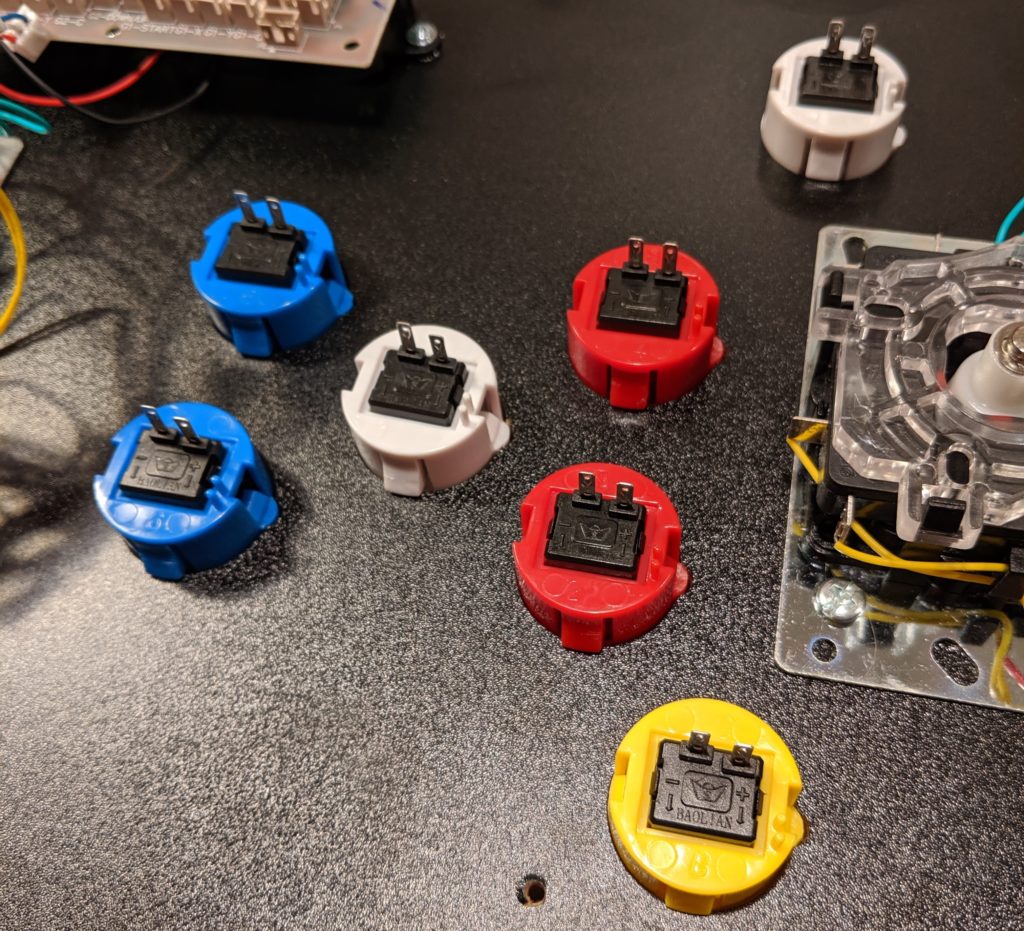
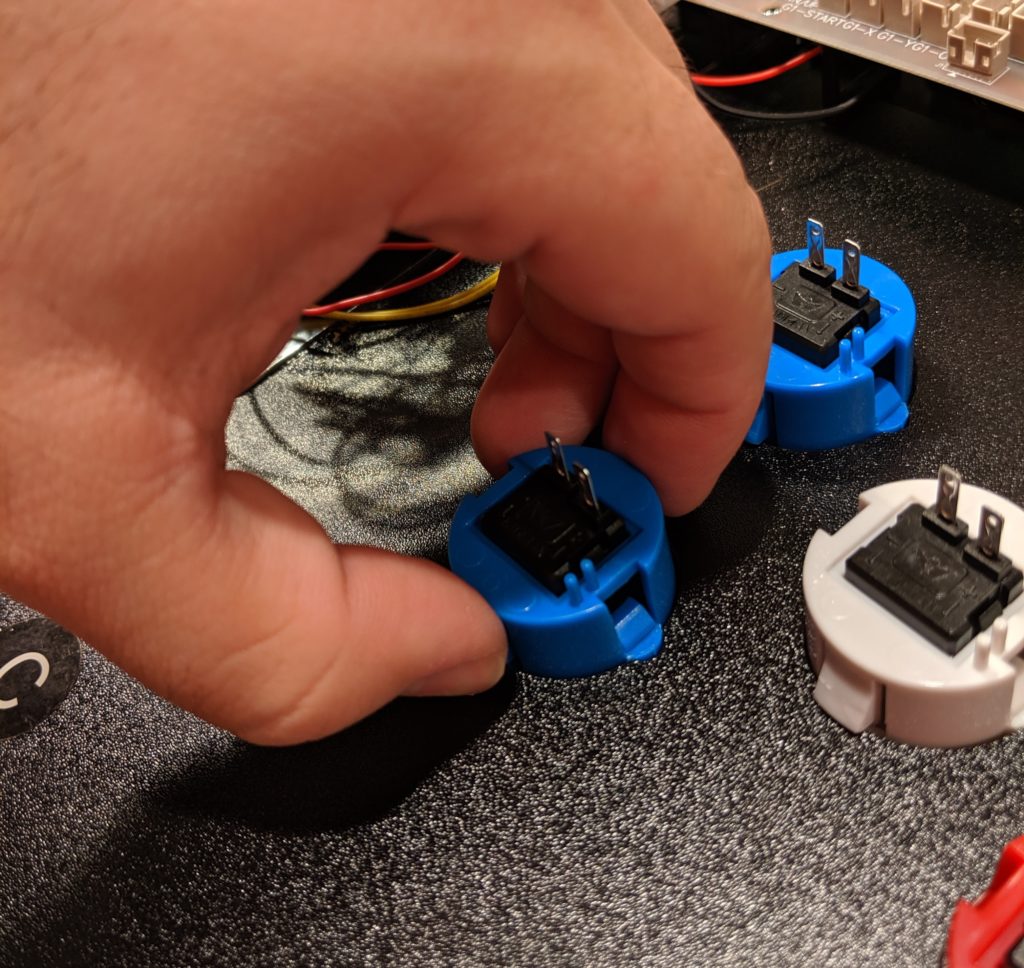
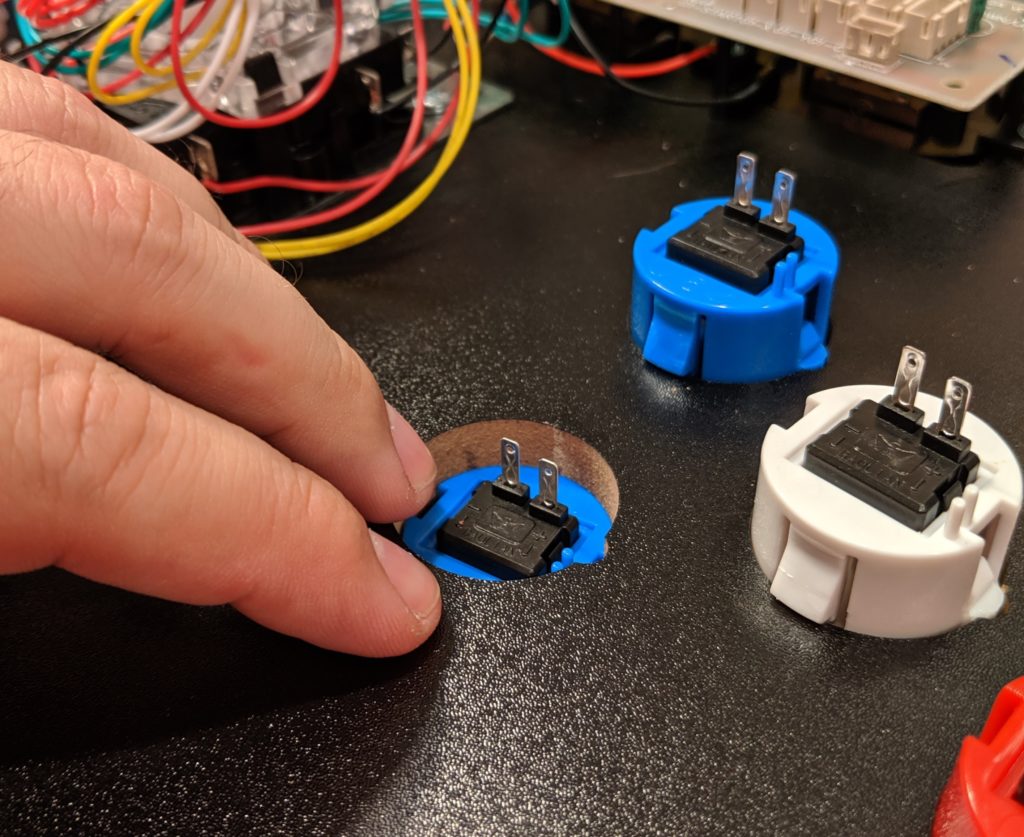
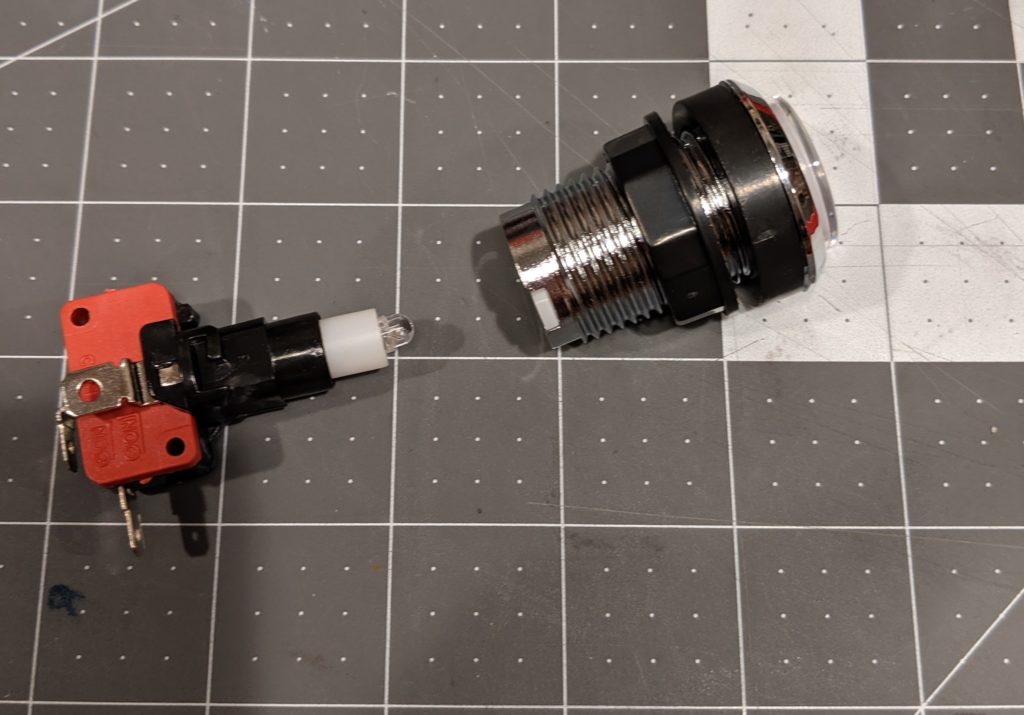
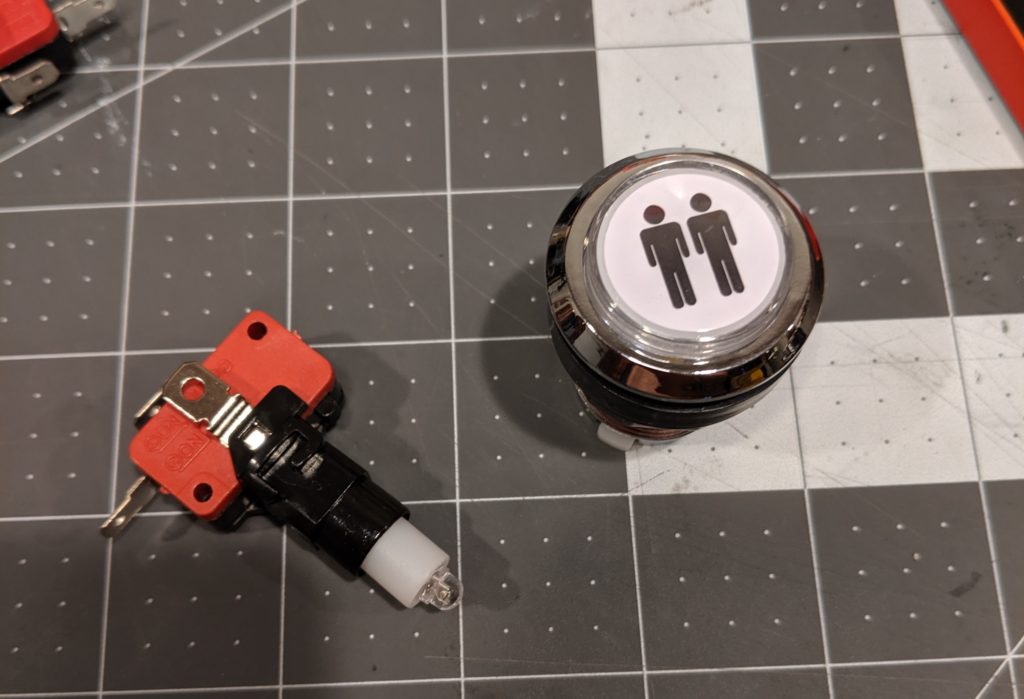
Step 7. Install the new buttons. These buttons are a little bit different from the original ones. They have two pieces, the mechanical part and the connectors and LED. You can separate them by twisting. They also have a plastic nut that help fix them to the board.
New button, side view.News button, top view.
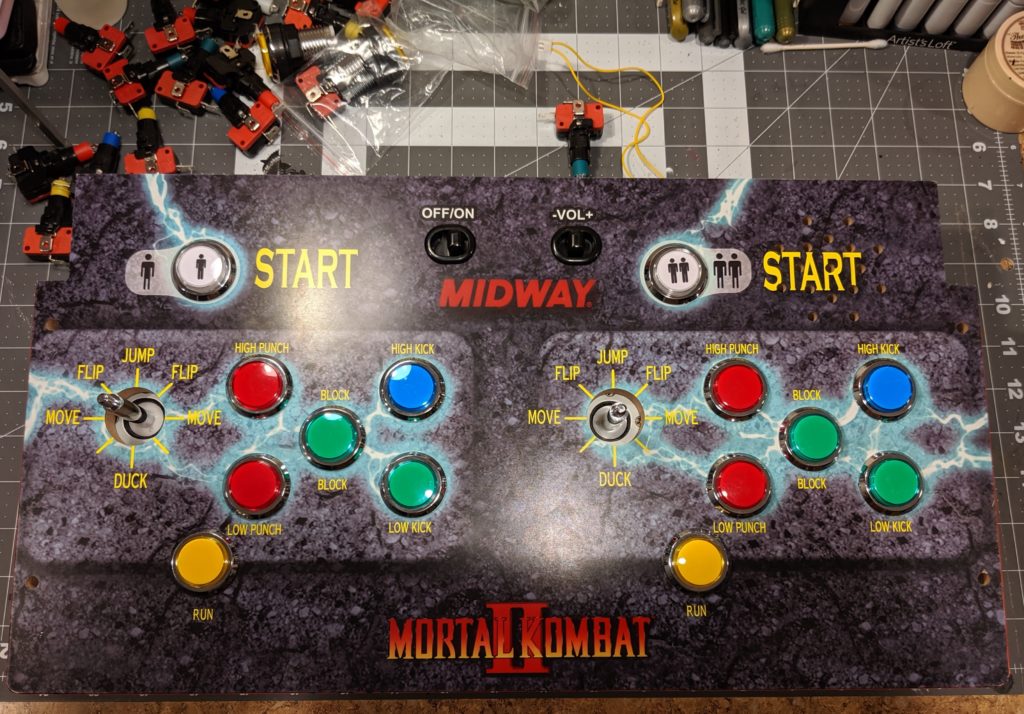
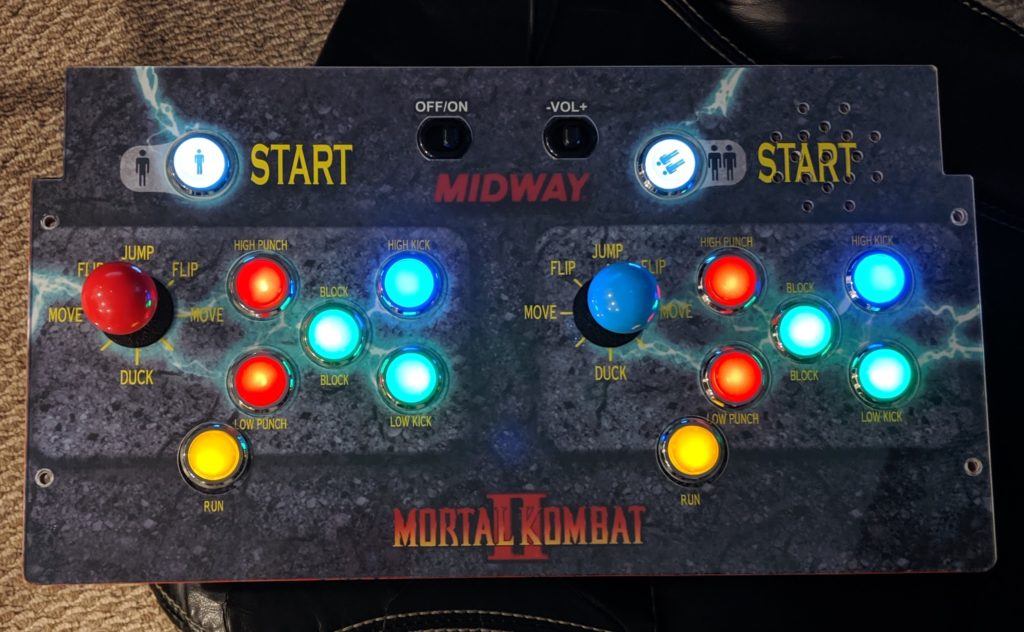
At this step you have the option to choose the color schema for your buttons. I choose something symmetrical. The button assignment is done later in software.
Step 8: Install the joysticks. Remove the bat top from the joystick. Insert it into the panel. Put the screws.
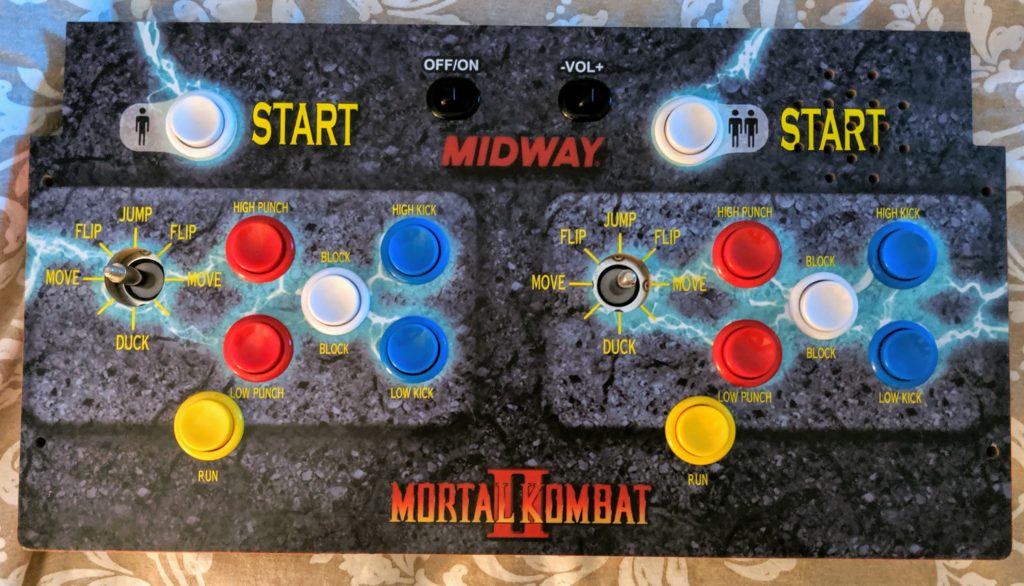
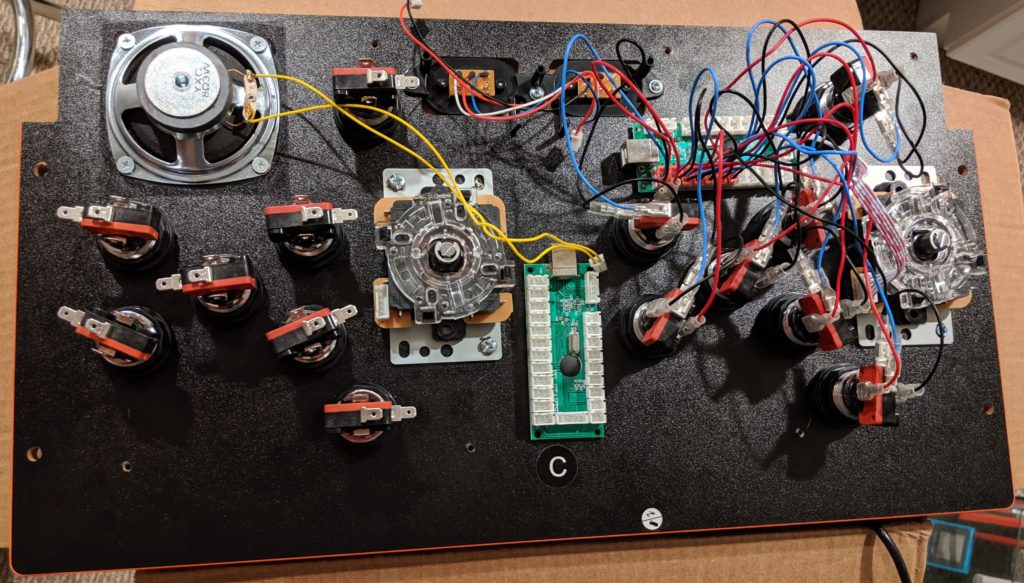
Buttons and joysticks installed
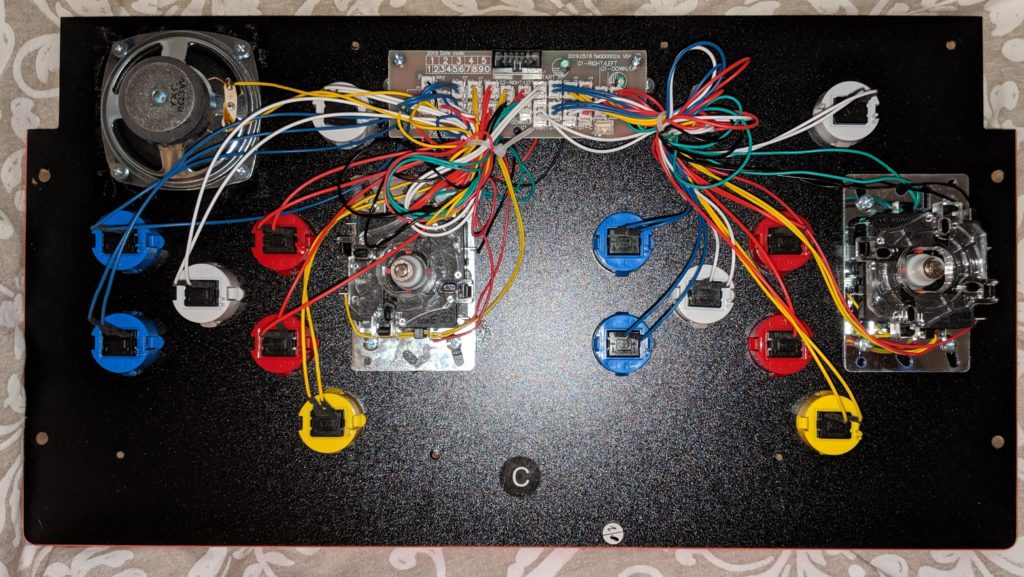
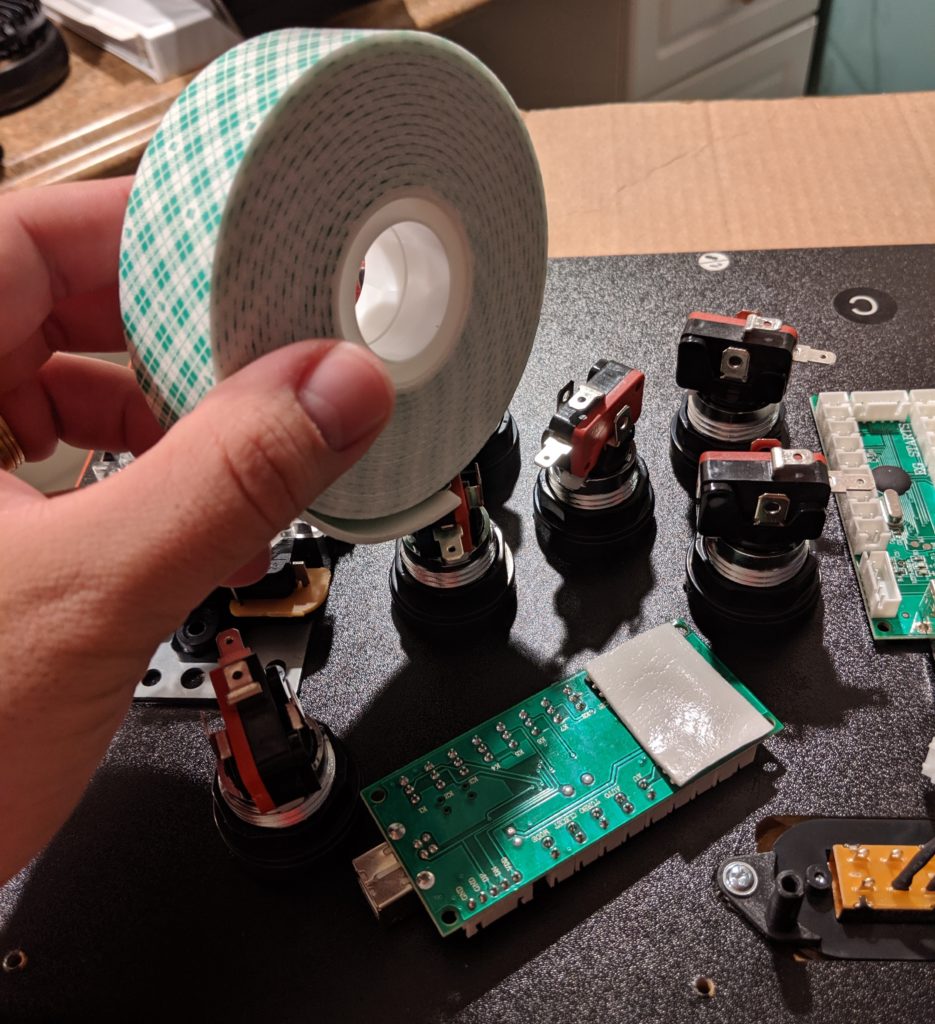
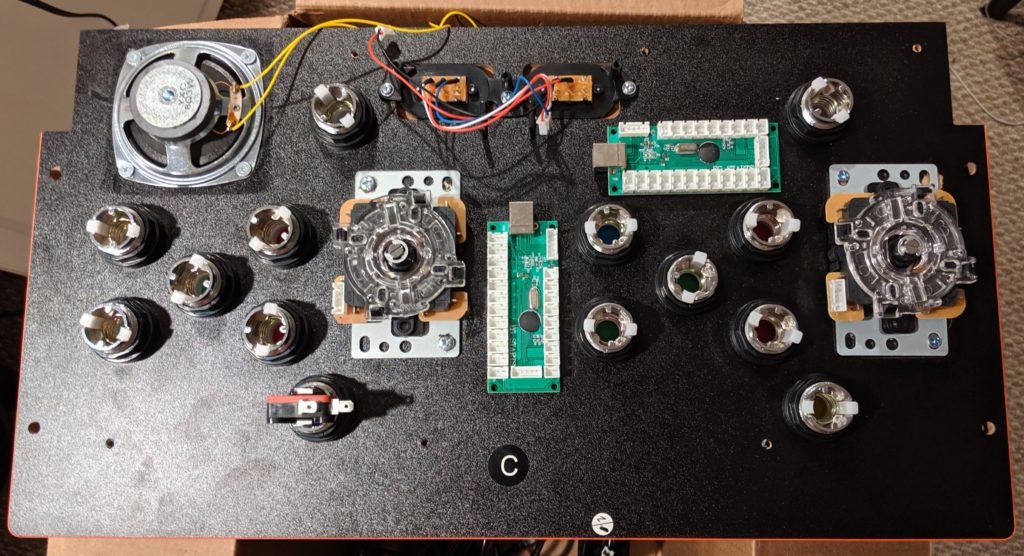
Step 9. Mount the USB control boards. I used Scotch Permanent Mounting Tape for this. Little screws would also do the job. When choosing where to mount them keep in mind the distance between the board and the buttons and also the USB wires.
Boards installed.
Step 10. Assemble the other end of the buttons. Just twist them in place.
Buttons assembled.
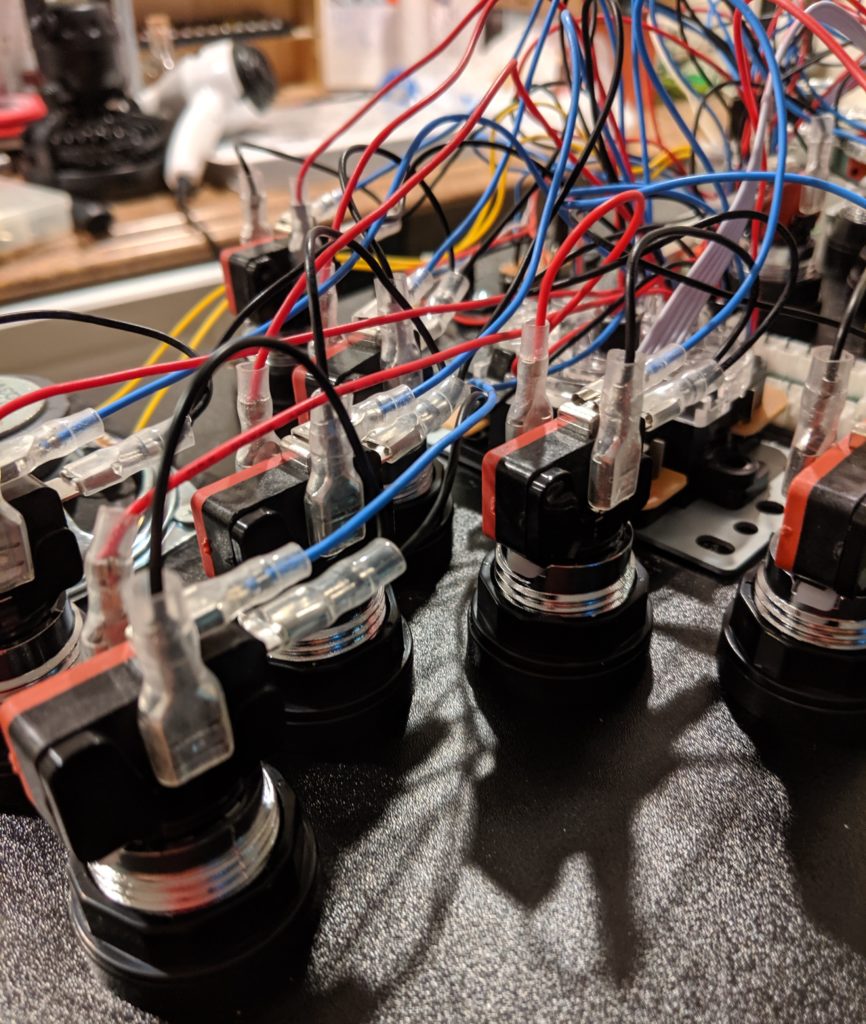
Step 11. Install the wires. Each button will expose four connectors. Check your manual for the proper color schema for the wires. They are different depending on the kit you choose and the kit you get.
The order that you put the connectors in the board is not really important because the configuration will be done later in software.
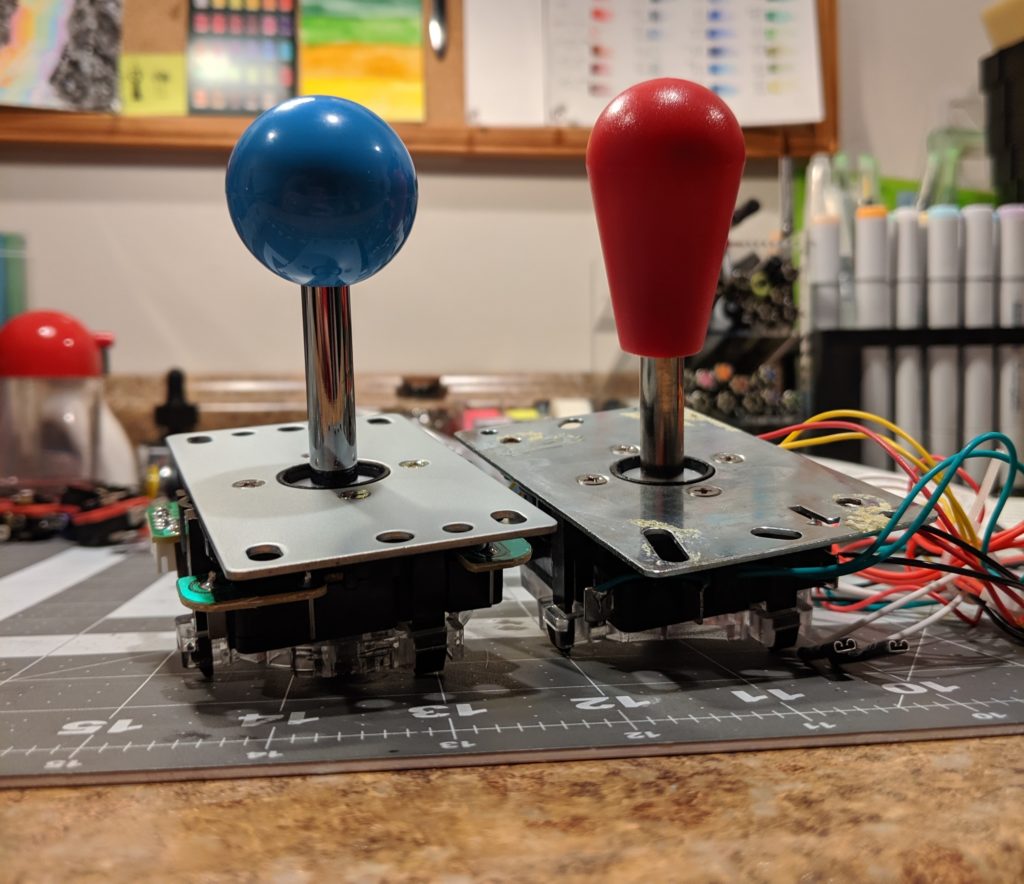
Step 12. Screw the joystick handle back. You can use the new joystick handle but can reuse the old one as well. The new joystick came with a balltop handle (left) and the original joystick had a battop handle. The handle is fixed screwing. You can easily change it latter without need of any tools.
Blue balltop handle (left) in the new joystick and the original joystick with a red battop handle.
Step 13. Testing everything. I this point I would recommend putting the protective plastic case back but secured by only a few screws because you will very likely reopen it soon to fix some buttons.
Plug the two USB cables from the encoding boards to a computer.
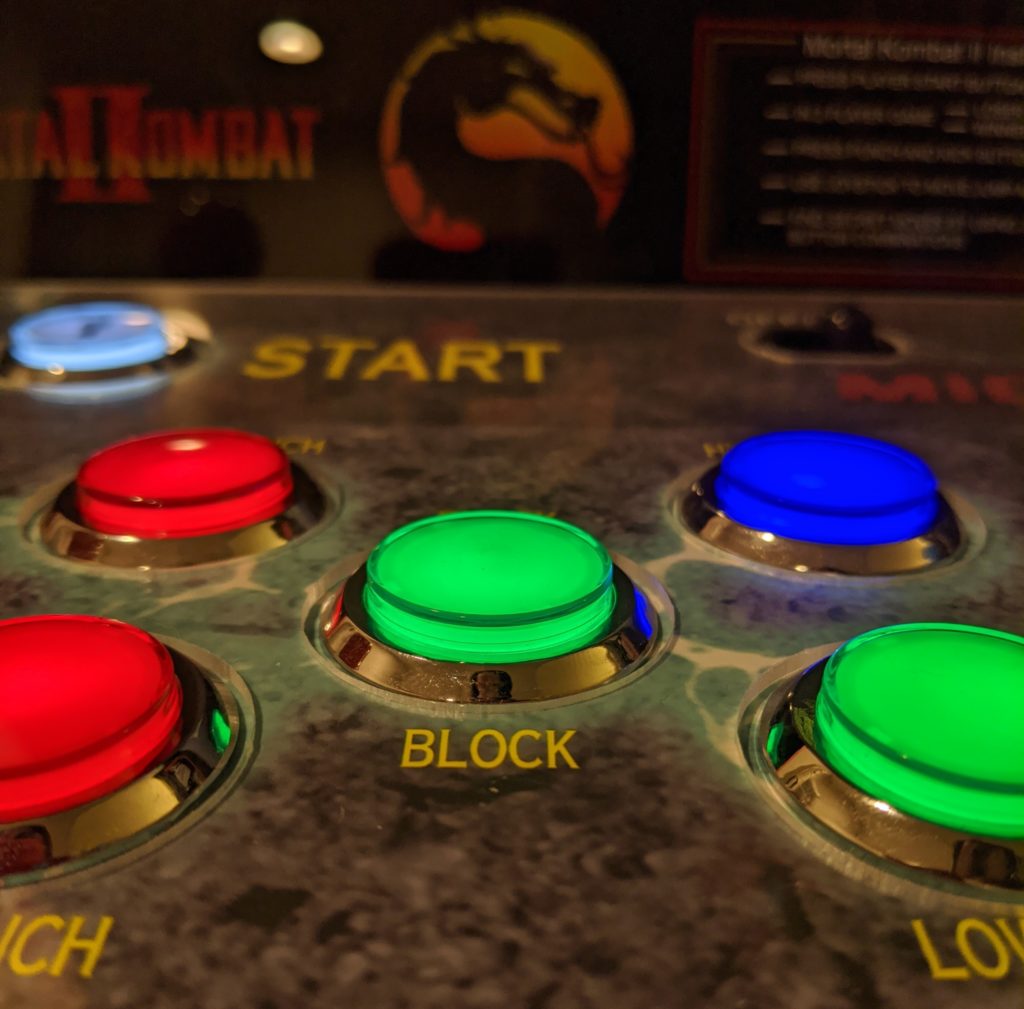
The first test is to check if the lights. If a light is not on it is probably because the wires are not correctly connected. If it is not that, then the LED could be failing. My kit came with some extra LEDs and components (but it was not necessary so far).
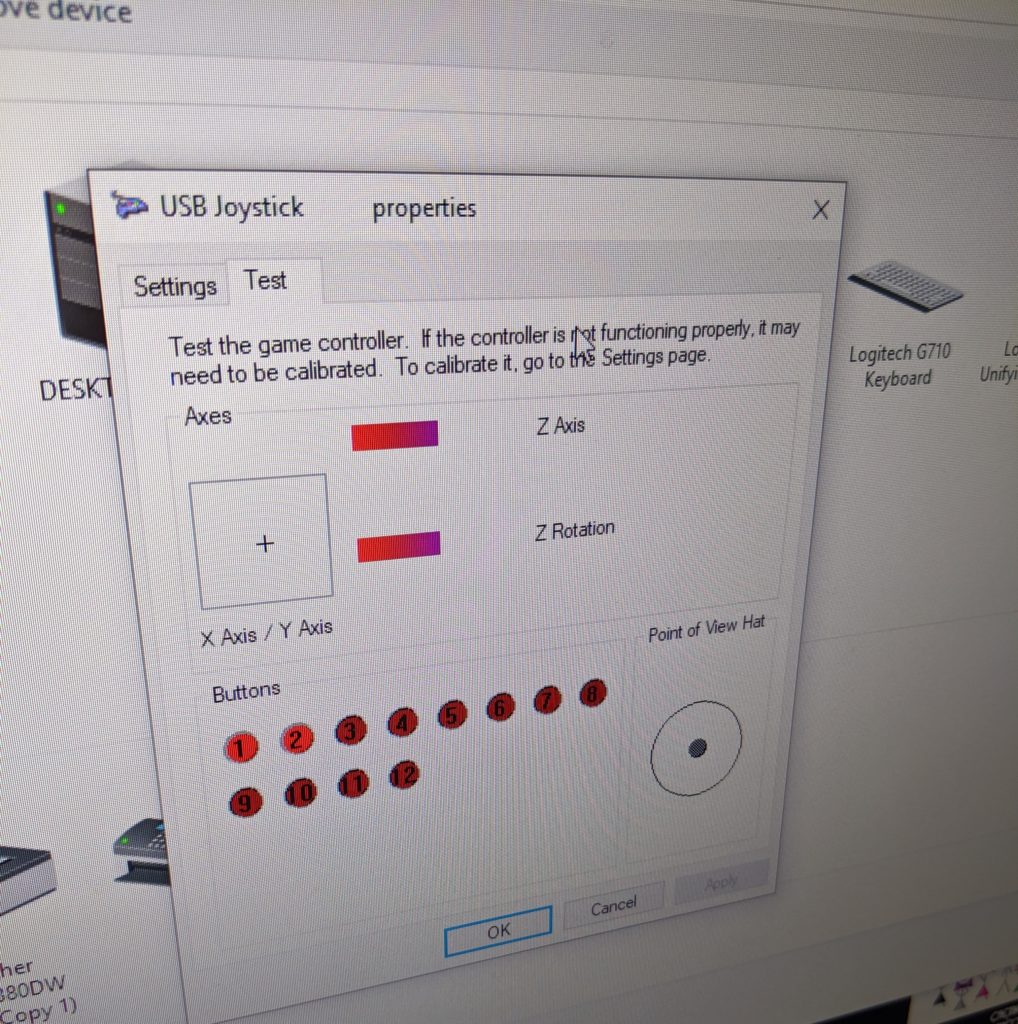
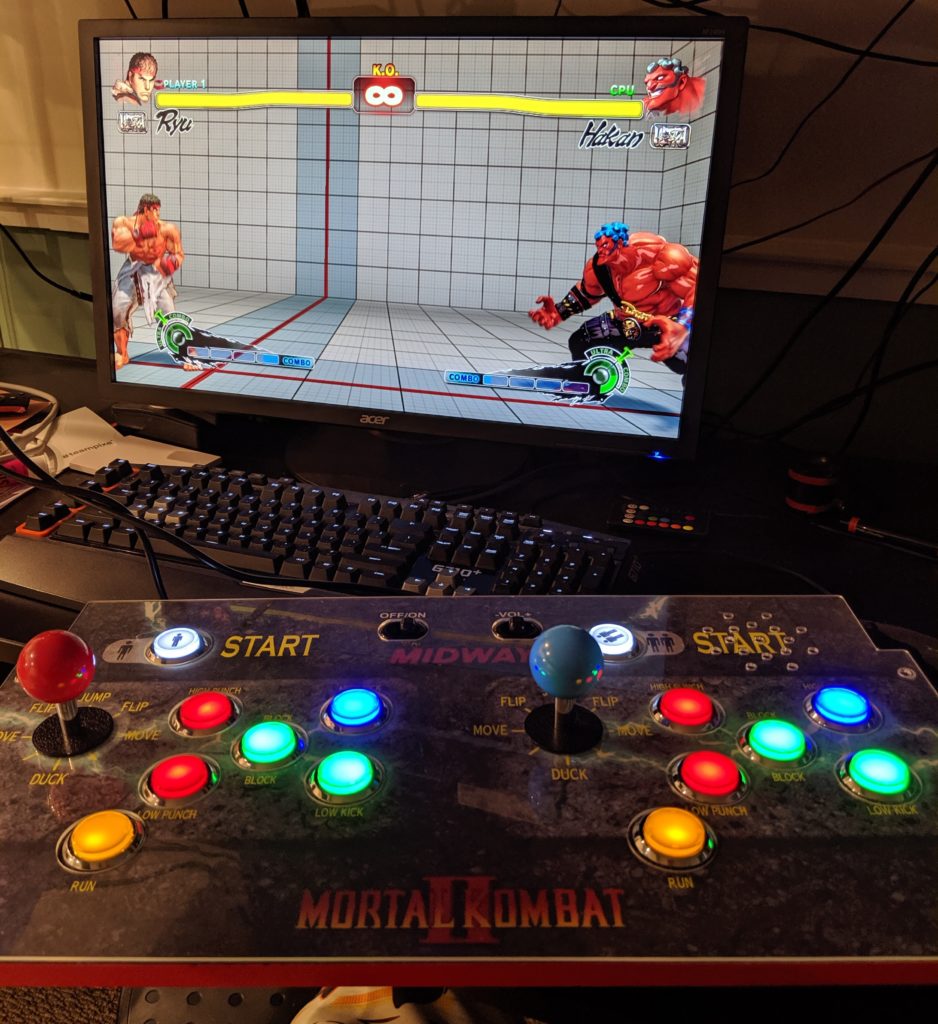
You can also test the whole control deck as two completely functional controls with the PC. Windows should auto-detect the boards as two USB joysticks.
USB Joystick configuration screen.Control deck playing Ultra Street Fighter IV on a PC
Installing the controller board
The original monitor from an Arcade1UP cannot be directly used with a video cable like HDMI. I’m using this kit for this. Make sure the code in the back of the Arcade1UP monitor matches the one in the description of the product.
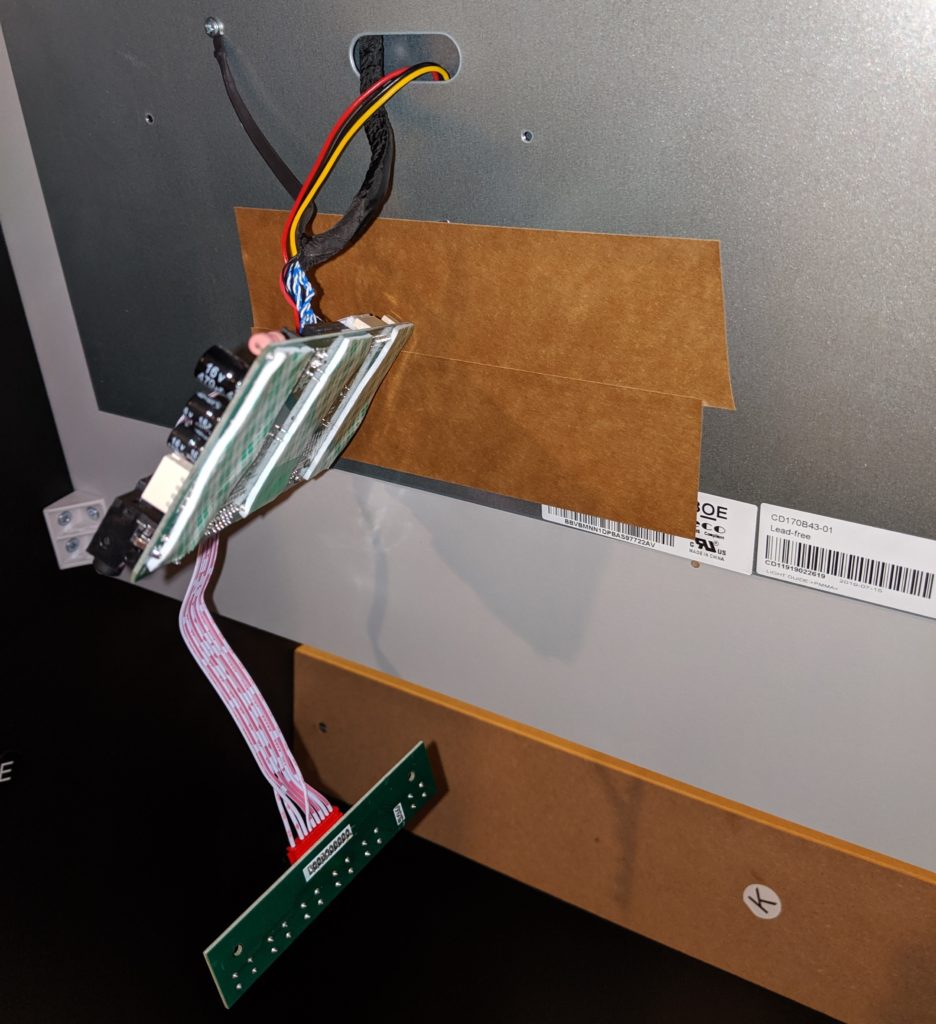
Step 1. Remove the metal box case with the original board from the monitor. This case holds the mother board of the original Arcade1UP. Remove the cables and remove it from the cabinet.
The heart of the MK Arcade1UP.
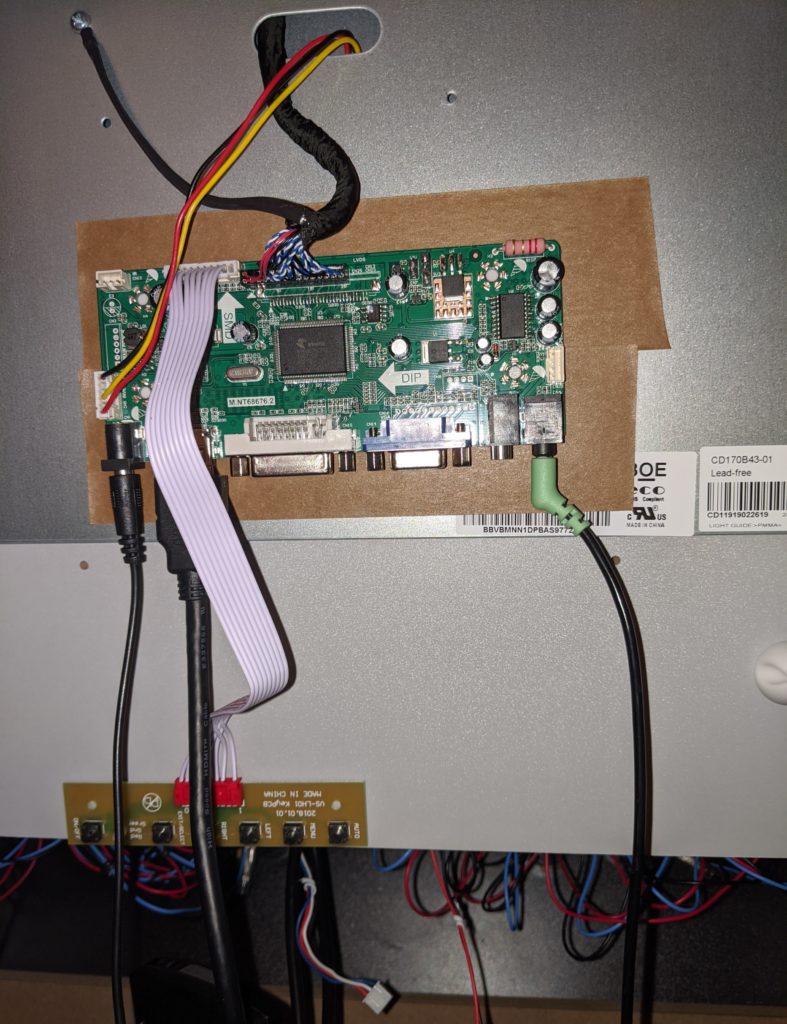
Step 2. Install the new board. I put some tape in the back metal panel of the monitor and used double face tape to fix the new controller board.
The power supply is the same from the original board. This board now receives a video input (HDMI, VGA, VGI) and displays it in the monitor. The smaller board with 6 buttons are like buttons in a TV where you can change volume, brightness, etc.
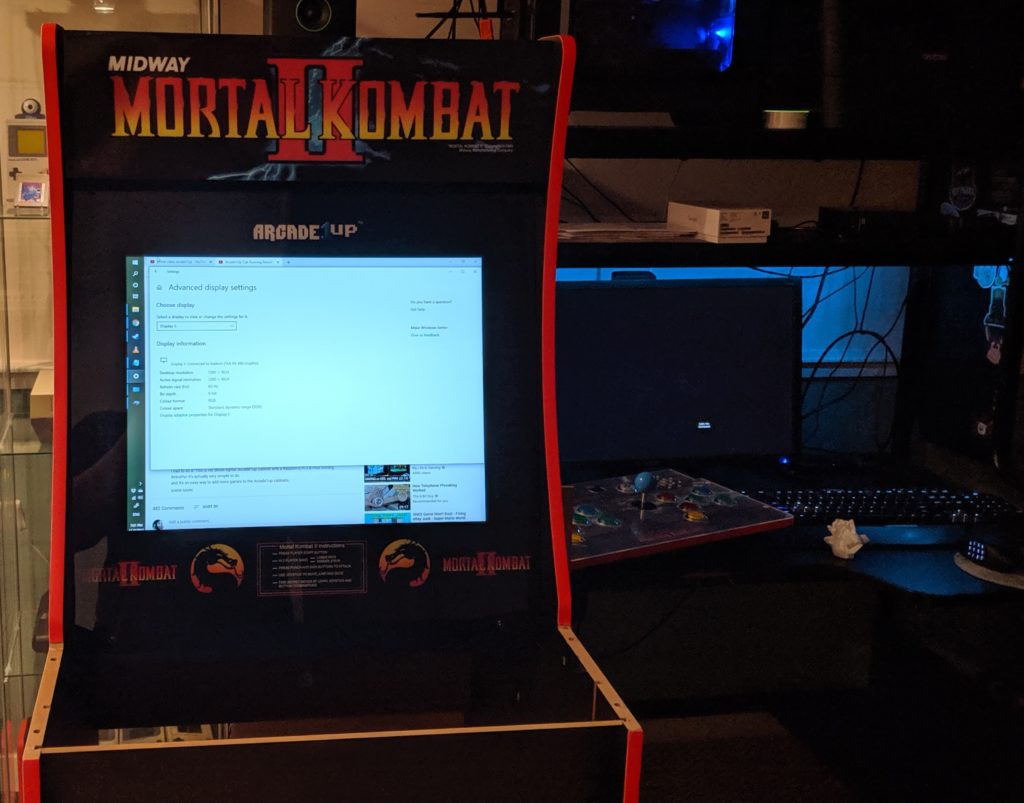
Step 3. Test you can display external video in this monitor. Just grab an HDMI cable from your PC and plug into the controller board. It should just display it like an external monitor.
Arcade1UP monitor connected from the PC
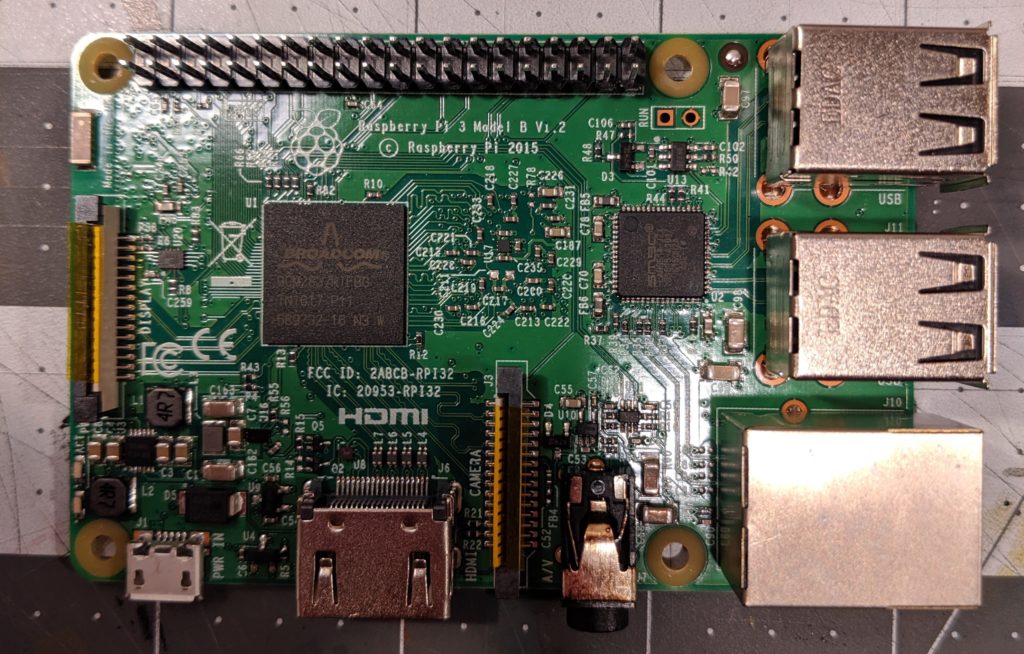
Installing the Raspberry Pi
A Raspberry Pi is pretty much a tiny Linux computer. It has everything on a single package (memory, CPU, motherboard, etc). I’m using RetroPie as a distribution. Retropie comes with everything you need but the actual game ROMs.
Raspberry Pi 3 Model B
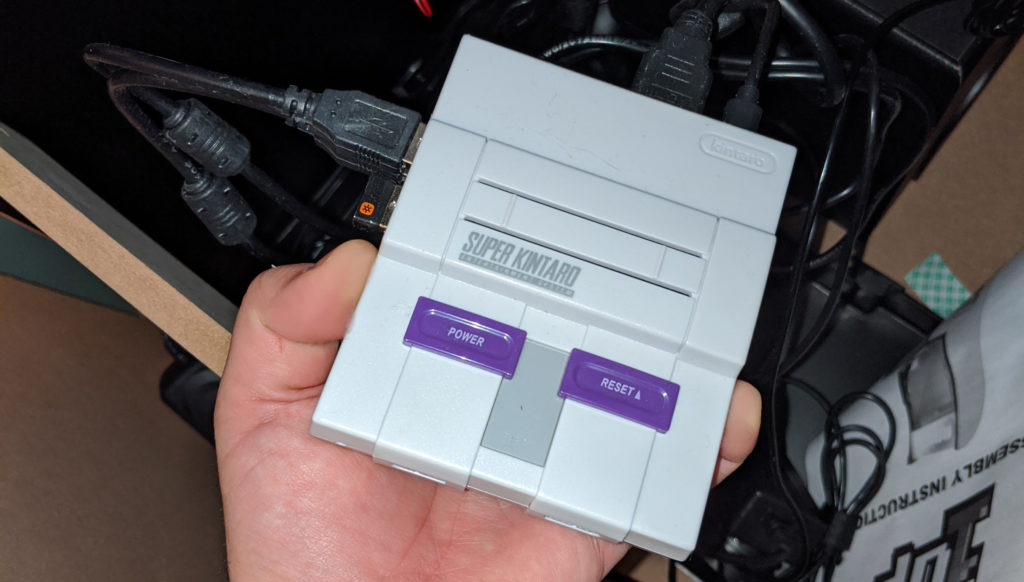
When I was building this I noticed that the Raspberry Pi 3 had the best compatibility and was working well with most of emulators and games. This is likely changing in the future so if I was building another machine now I would check this again. I already had a RPi 3B with a case (Kintaro Super Kuma) from another project.
Raspberry PI with a SNES inspired case
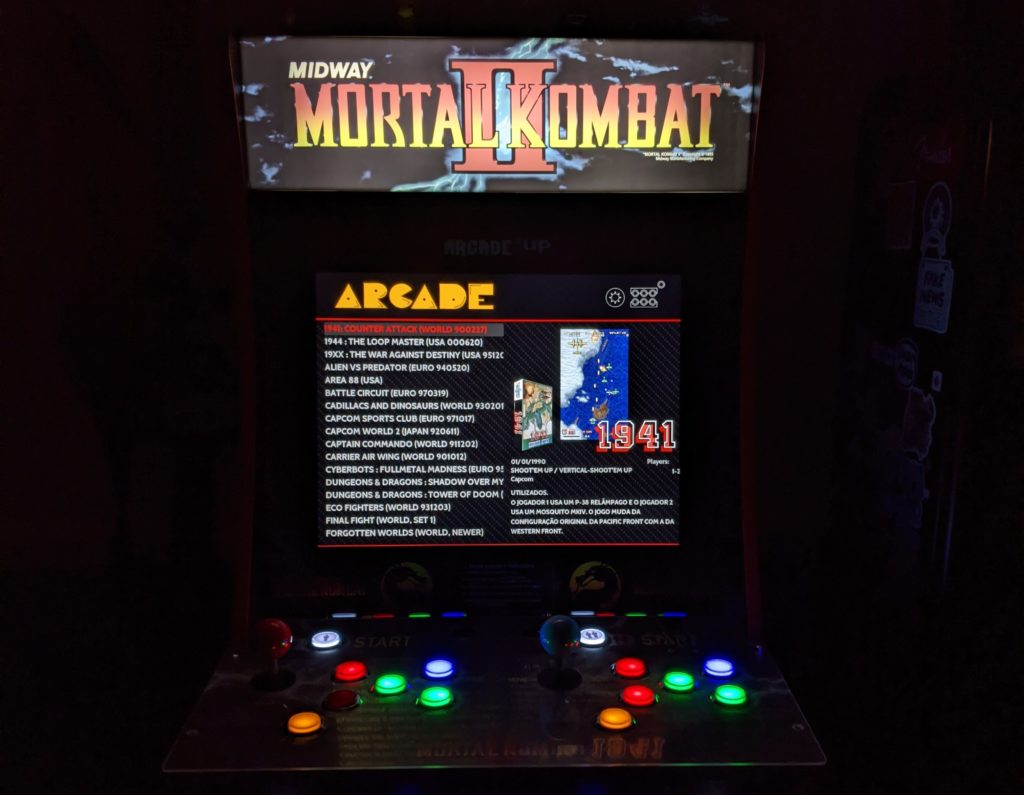
For now I’m not going to put here fine grained details on the RPi installation and configuration. In short, you need to download RetroPie, make a bootable SD card with it, stick it into the RPi and boot it. There are many ways to add games but the most practical one I found was via network using SMB (Samba) at “\\RETROPIE “. Making sure the files are in the correct folders for each emulator. For example rooms for Game Boy should be at “/home/pi/RetroPie/roms/gb/” and for Neo Geo at “/home/pi/RetroPie/roms/neogeo/”.
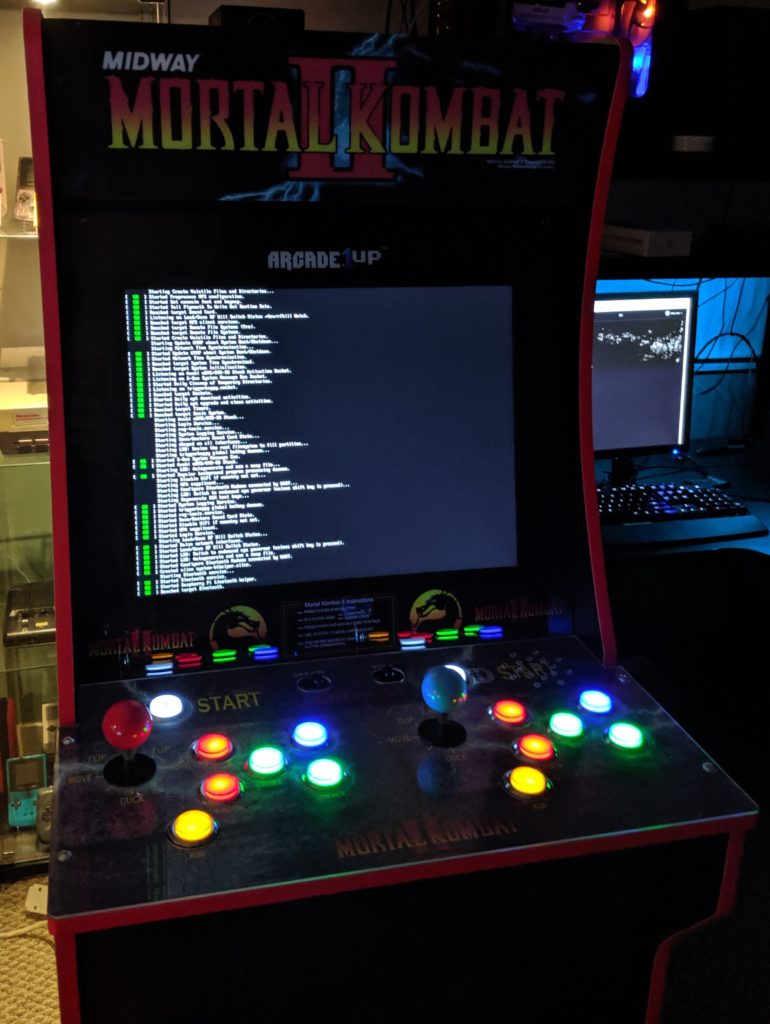
Raspberry Pi booting with Retro Pi
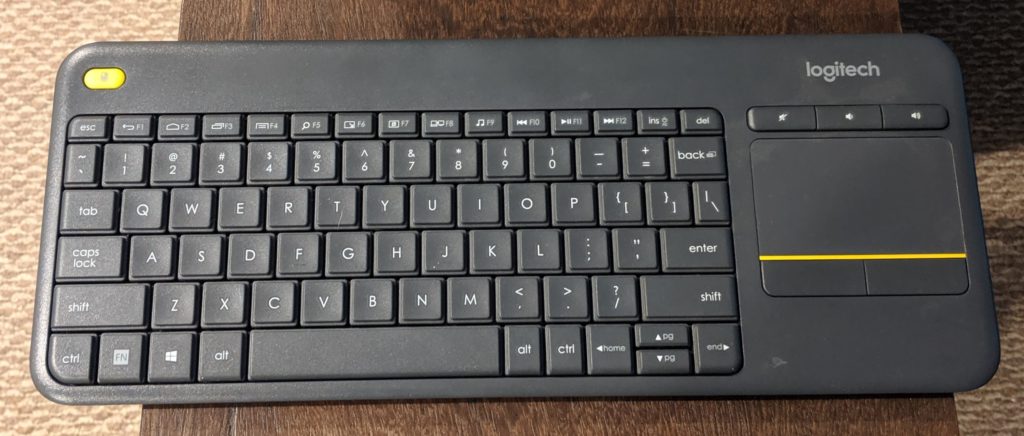
To make the whole process easier I highly recommend using a wireless keyboard like the Logitech K400 Plus that already comes with a touchpad. It’s small, takes only a USB slot and is great keyboard to have around for projects like this. You can press Ctrl + Alt + F2 to access the Raspberry pi terminal (F3 to F6 for TTY3 to TTY6 respectively). Retropie default user is pi and default password is raspberry.
Light up marquee working.Logitech K400+
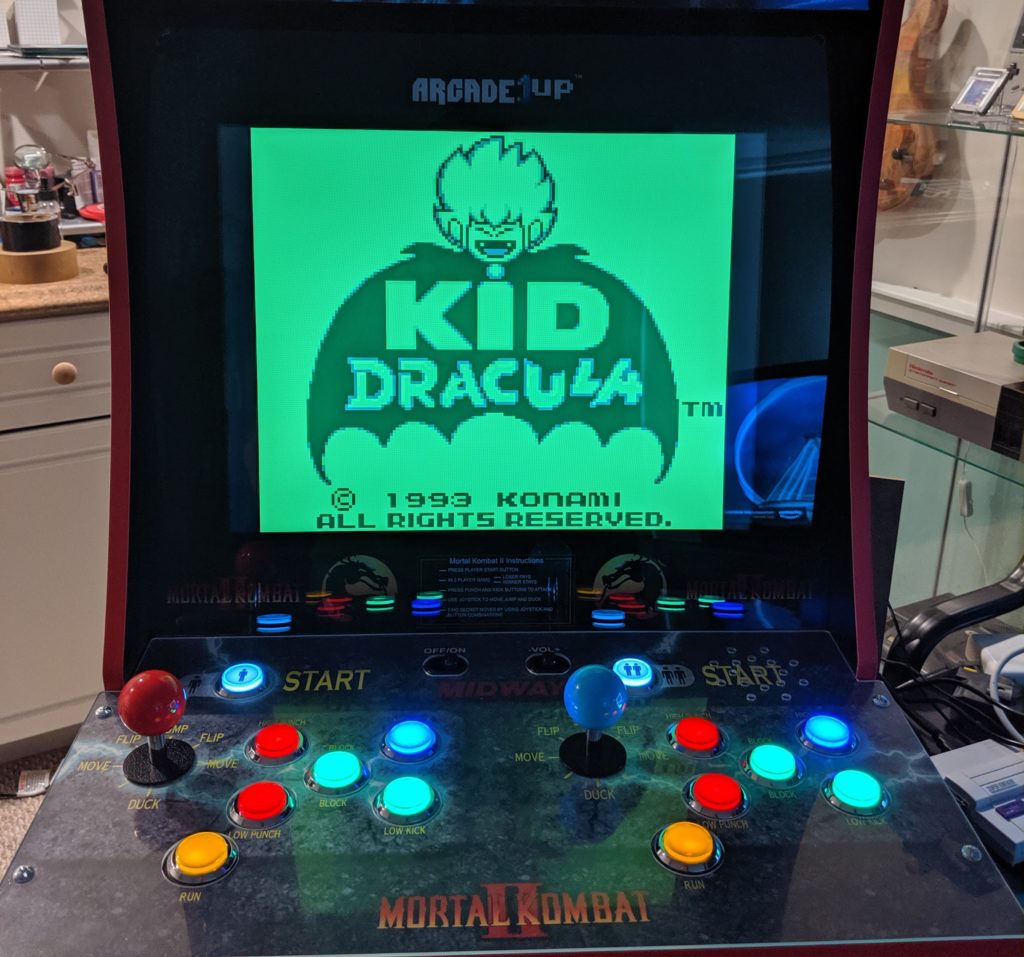
I done my first test with the Game Boy emulator and Kid Dracula. After that worked I moved to test more games.
Kid Dracula. Game Boy, 1993.
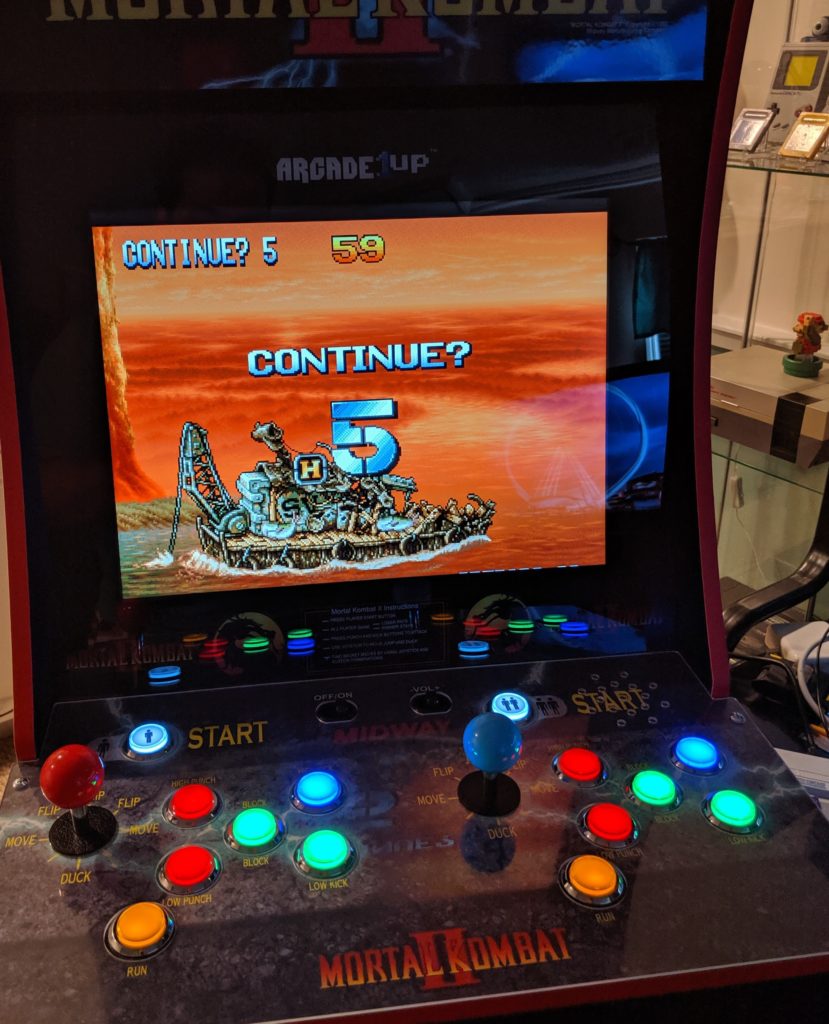
When I moved to games with a little bit heavier emulation I started to get this error.
under-voltage detected
The documentation for this said “The undervoltage icon is displayed when the voltage the Pi is receiving drops below 4.65V. “. Indeed, I was using a common USB charger. I then moved to a dedicated charger designed for a RPi that could provide enough current and voltage to power the RPi.
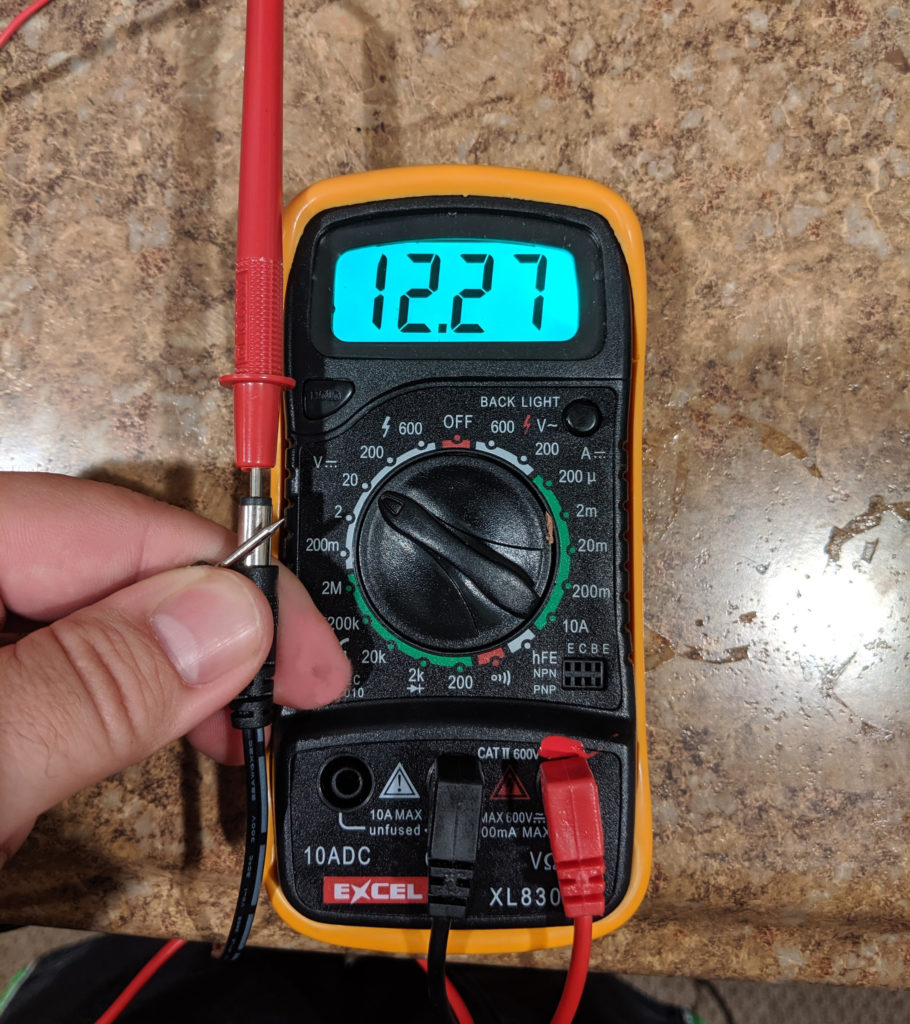
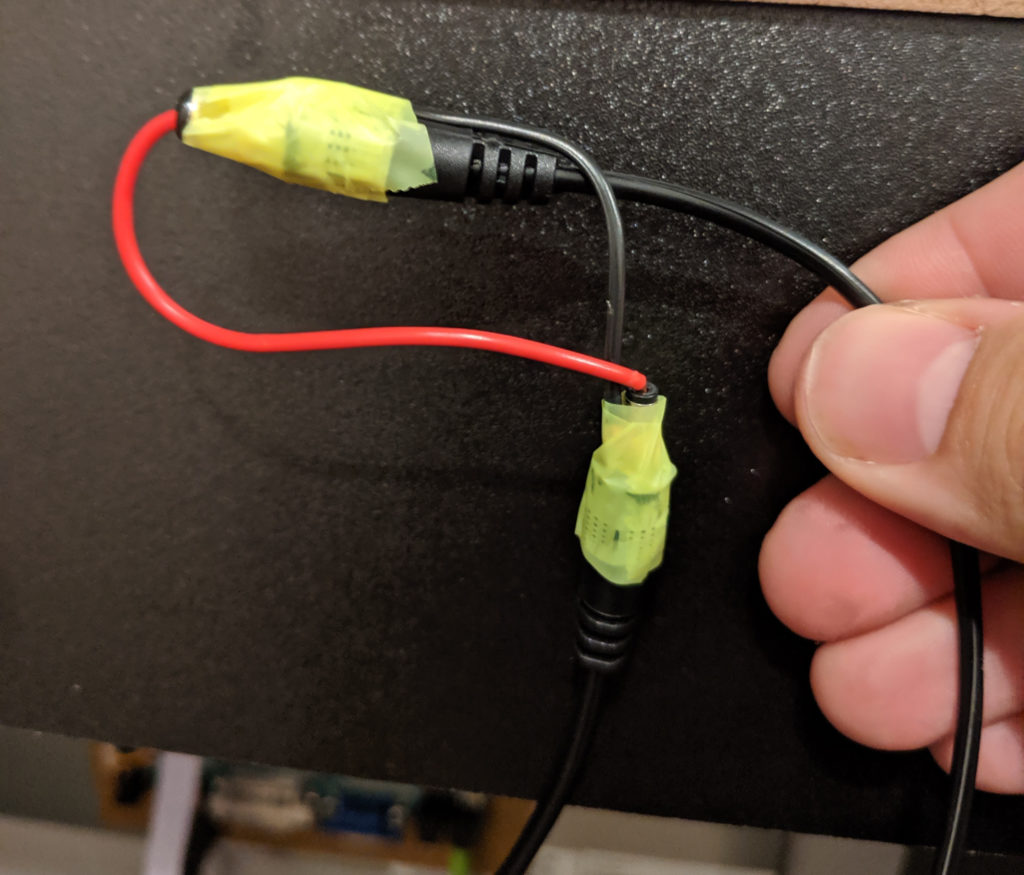
In the original light up marquee was powered by the output of the main board. The original power supply now powers the monitor controller board. I used this splitter cable to send one cable to the controller board and the other the the light up marquee. It’s always worth checking the polarity and voltage of these things.
Testing voltage and polarity.
Because the splitter outputs two jack cables (male) and the lightup marquee cable is also a jack I had to do this workaround to connect the two cables. Cutting and reconnecting the cables would also work but I did not want to do that to the marquee cable. Later I will fix this.
“Nothing is more permanent than a temporary solution”, old Russian proverb.All working.
Alexa integration
In front of all this I’m using an Amazon Smart Plug so I can say “Alexa, turn the arcade on” and everything is powered with all the lights and sounds. Other people have reused the on/off switch from the original control deck for this.
Conclusion
At this point this arcade cabinet is fully functional and can play hundreds of games. I’m still doing further modifications and improvements but they will come in future posts.
This is the Mortal Kombat Arcade Cabinet from Arcade1UP. It’s a complete arcade machine with a smaller size for someone who’s tired of playing ios games for money. Out of the box (and after assembly) this machine can play 3 original Mortal Kombat games:
Mortal Kombat (1992)
Mortal Kombat II (1993)
Ultimate Mortal Kombat 3 (1995)
It comes with everything you need to play the games. It has joysticks for 2 players, embedded screen and sound. It’s powered by a regular power outlet.
Dimensions: This unit (with the raiser at the bottom) weight 58.5 lbs (26.5 kg) and have height of 45.8†(116.33 cm), length of 22.75†(58.78 cm), and width 19″ (48.26 cm). It is said that Arcade1UP machines are 3/4 of the size of a regular arcade cabinet. The riser has length of 20.5″ (52.07 cm), width of 19.75″ (50.17 cm) and height of 13.25″ (33.65 cm). With the raiser, it has a perfect size for me with controls and monitors at the right height. Seating at the stool makes it even more comfortable.
This machine has the Raiden painted on it’s side just like the original MK2 machine. This is probably my favorite thing about this cabinet.
Dog for size comparison. Dog not included.
Gameplay
While this is not an original Midway arcade system board, all gameplay is executed through some form of emulation. You don’t have to deal with any artifacts of emulation or even have to think about it. The machine just works. You turn it on and you are playing Mortal Kombat in a few seconds. No coins. No charging gamepads batteries. No software updates. No DLCs. No cables. No wifi. No where is the TV remote. Just Mortal Kombat one simple power button away from you.
All games are working perfectly. I could not notice any flaws. I’m sure some arcade hard-core enthusiast will find some minor obscure detail that is different from an original coin operated vintage machine but I could not notice any difference.
The emulation is straight forward, there are no filters, no settings, no save states.
This of course uses LCD screen and not a big CRT monitor. The screen is 17″ which is a great size. As everything else, you can’t change brightness, contrasts, or anything. However, I have no problems with the default configurations it came with.
light up marquee
Control deck
The control deck can support up to 2 players. Each player has 7 buttons and a joystick. The start button is wired to the start input and the coin input. So by pressing start is the same as inserting a coin and pressing start. There is a power switch for the whole machine. There is a volume switch with 3 states: mute, medium and high.
The buttons are not great but usable and functional. They have a cheap feeling and don’t make a characteristic click when you press them. However, they work, they submit the input and have the proper size.
The joystick also is functional, clicky and usable but could be of better quality. I like that they use a bat top handle which I find preferable for fight games and is the same type used in the original MK machines.
This one comes with the transparent deck protector to avoid scratches in the deck paint.
It’s a okay control deck. Keep in mind that arcade controls is a whole field for hobbyists with many different brands of joysticks, buttons, and setups. All with very broad price ranges.
Mortal Kombat custom stool
Stool
The Mortal Kombat custom stool is great. I would probably never buy this one by itself but I’m glad I have it now. It has a glossy finish that looks great. It feels great, it’s comfortable and while you cannot adjust the height I found it just perfect for this machine.
Marquee light
This is a great addition to this machine. It really enhances the look and feel of an arcade machine. That is something that I definitely would add to any Arcade1UP machine. It’s just a plastic piece with a light behind it. My only criticism is that the colors of the marquee are a little bit desaturated.
Pricing
I bought this bundle at Costco and it set me back US$ 350. All prices mentioned here are without taxes, fees and shipping. This bundle includes the machine and a custom stool, light up marquee, custom riser, and the arcade cabinet.
These are some current prices for everything individually.
MK custom stool: I found it at GameStop for US$ 80.
MK light up marquee: I found one at Amazon for US$ 60.
MK Arcade1up: you can find it at Walmart for US$ 299.
Deck protector: Arcade1UP sell them for around US$ 12.50.
MK custom riser: it seems to be exclusive at the moment but you can buy a standard riser at Walmart for US$ 49 and a set stickers at eBay US$ 55 (total US$ 104) or buy a bundle of arcade and riser at Walmart for US$ 379.
Therefore, right now to replicate this Costco bundle elsewhere it would cost US$ 531.50, i.e. US$ 181.50 more than Costco.
However, these prices fluctuate. These units are heavy and large (45.8â€H x 22.75â€L x 19â€W), therefore occupying a lot of shelf space and they are expensive to ship too. So it’s been common to see the prices of them getting lower (examples) and it’s predictable that during Black Friday and holidays they will go lower again. However, in my personal experience these deals sell fast and I have made several unsuccessful trips trying to get one for a lower price.
Also, let’s keep some things in perspective here for price. First, a real Mortal Kombat II arcade machine is much more expensive, starting from around US $1000. Second, Costco is a paid membership based store. If you are comparing prices keep in mind that you can’t buy at Costco without a membership (starting at US$ 60).
Assembly
The pieces themselves are well labeled with codes. However, the boxes didn’t have any labels. After you open all the boxes and found all the pieces, the assembly can go smoothly. The process is almost the same to assemble an IKEA furniture.
These were some of the problems I faced during the assembly:
The pictures for the monitor in the manual did not match the real monitor. That’s because the manual is generic for all machines but machines are slightly different.
One package of screws was mislabeled.
There was misalignment when mounting the screen piece to the cabinet. That was the only hard part of the assembly.
The back panel was missing the screw holes to align to the screw holes inside.
You have to do this when the machine is in demo mode inside one of the games. With Player 1, hold the buttons RUN + BLOCK. With player 2, hold the buttons JUMP (UP) + LOW PUNCH + HIGH KICK + START (player 2). Hold them all for 5 seconds.
You are now in the Test Menu. Here you can run tests and change settings such difficulty and volume. This is not an Arcade1UP menu, it’s the original test menu from the arcade games. This was supposed to be used by the arcade owner (and not the arcade player) to change settings, reset high scores, see statistics and change prices.
Conclusion
This product has a limited scope and great execution. It’s a simple machine that does one thing and it does it well: retro arcade Mortal Kombat. It has a sweet point of compromise between an humongous original arcade and a convenient little console while keeping all the characteristics that it feel like an original arcade experience.
Arcade1UP machinesDimensions and size comparison
Arcade1UP has a great product but they are iterating very well. They started with older titles and are now expanding for some other franchises. They are also experimenting with different arcade types. I hope they keep improving the quality of their products.
While there are ports or emulation of MK 1-3 on pc and modern devices you just can’t emulate the feeling of playing with an arcade machine with all colors, lights, and size. This is a device for someone for is seeking this feeling.
And while I like Mortal Kombat and this machine, the main reason I bought it was to use it as base for further enhancements and modifications. I’m replacing all button, joysticks, lights, computer, and who knows what more. I will transform this machine into a multi-arcade beast with my favorite games.