Skip to content

Tag: hpc

Parallel Build Benchmark

You can optimizing your building times using a parallel build process.

The GNU Make supports it using the parameter –jobs=N (or -j=N), where N is the maximum number of jobs that can be realized at the same time, usually compilation jobs. By default, Make will perform just a job per time. Using -j without arguments imposes no limits on job number. There’s also the load approach using –load-average.

Here’s a benchmark I did showing four different complete builds of the Inkscape project, from one to four jobs at the same time. I used a Intel (Yonah FSB667 Mhz/2MbL2) Dual Core with 2 Gb of Ram with a common Ubuntu 8.10 and default build parameters and no additional optimizations.

chartinkscape_parallel_build.ods

Just compiling with make –jobs=2 instead of just make, almost doubles the speed of the build. As I’m using a dual core processor and the heavy compilations dominate the build process, the best result was with 2 jobs.

I had no trouble with those builds but it’s known that you can have problems such implicit dependencies among targets or memory exhaustion. There’s a good article, Optimizing Build Times Using Parallel “make”, on this subject. On the Make manual, there’s also a section on parallel excetution.

So, next time you try a make, try using make –jobs=2 and see the results. 🙂

Event Review: Comsolid

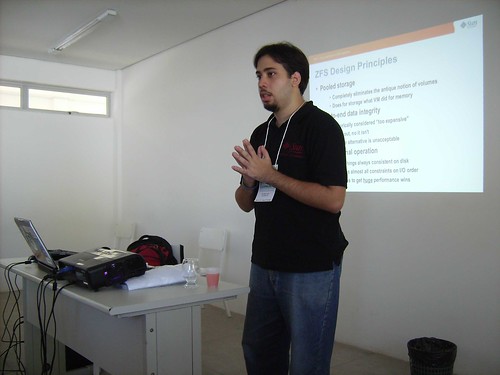
This week I did another presentation outside my city. This time it was at Maracanau in the Comsolid, a open source and digital inclusion event.

IMG_0080

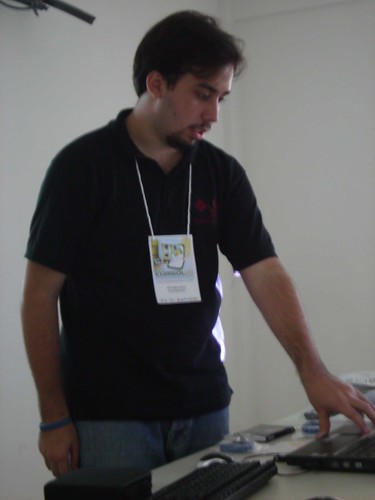
My first presentation was about ZFS filesystem and how you can take benefits from it like pooling storage and self healing. I used as base for examples my last post on it, Trying to corrupt data in a ZFS mirror.

Eu

IMG_0112
Eu
IMG_0114

My next talk was about OpenSolaris. We had a lot of questions and interesting about this. We burned some cds with OpenSolaris 2008.5 and also distributed others versions of OpenSolaris like Solaris 10.

IMG_0120

And my last presentation was a quick talk about high performance computing, a short version on that I already did before.

Was a interesting event mainly because the public was composed primarily by young students with few background on TI. It was a challenge to present some new concepts like pooling storage for those who aren’t familiar with filesystems management. I tried to keep my talk as simpler as I could and focus on daily problems and showing that you can avoid them with some open source technologies.

The full album is available at http://flickr.com/photos/silveiraneto/sets/72157605632001295/.

International Free Software Forum 2008

Every year in Porto Alegre, Brazil, is placed the biggest free software event in the world. Is the International Forum on Free Software, FISL. This year the event counted with 21 countries, 257 presentations and more than 7 thousands hackers, students, developers and entrepreneurs together sharing knowledge and making friends.

FISL 2008 Theater

Just a few hours after NetBeans in Fortaleza. I was flying to a long trip to Porto Alegre (almost a entire day) to join in three events, the FISL 9.0 itself and also OpenSolaris Day Porto Alegre and Javali 2008.

Solaris Express and Coffee express
I like my coffee like my Solaris, Express. 😛 Installing a newer version during a free time in the airport.

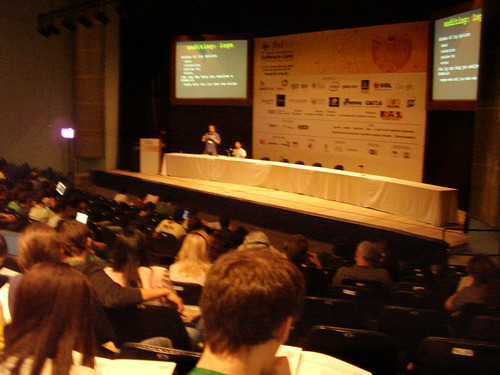
At OpenSolaris Day I presented High Performance Computing and OpenSolaris showing an introduction about parallel computing concepts and a little bit about how to take advantage of OpenSolaris for HPC, using tools like ZFS and Dtrace for OpenMPI. Was a good presentation and I got good questions.

Audience

Me on OpenSolaris Day

Me on OpenSolaris Day

After the OpenSolaris Day/Javali 2008 we all had a pizza party. I was really sick during my presentation, I’m not familiar with temperatures beyond 25° and that day was 8°.

Pizza party

Some Sun Campus Ambassadors

The presentation I prepared for FISL was “NetBeans: Beyond Java” showing a little bit how you can use NetBeans to develop using Ruby, C, C++ and others languages. I’d like to show that NetBeans is more than a Java IDE. I showed more about the Ruby and Ruby and Rails integration.

Some photos:

NetBeans on FISL

NetBeans on FISL

NetBeans at FISL

My second presentation on FISL was about JavaFX. This presentation was not really planned and I have just a couple of days to organize it. Fortunately I contacted the JavaFX community from openjfx project and immediately I got a lot of help to build some material. A very sincerely and special thanks for James L. Weaver who helped me immediately a lot. Thanks too to the Planet JFX community and their material.

JavaFX on FISL

JavaFX on FISL

JavaFX on FISL

Was really a good demo. I was more relaxed than in my Netbeans presentation and also I got a excellent feedback.

More photos:

OpenSolaris User Group

OLPC XO

OpenSolaris
Thirtankar Das talked about project Indiana.

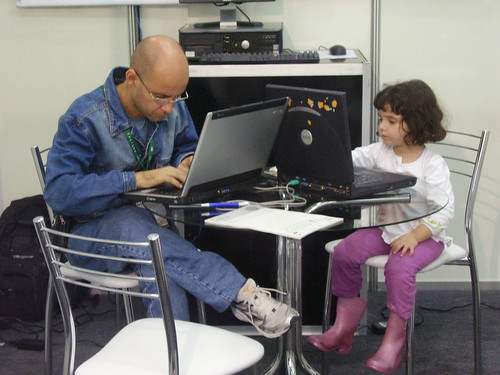
Man and child using their laptops

Rafael Vanoni talking about OpenSolaris Kernel
Rafael Vanoni talking about OpenSolaris kernel scheduling.

Roger Brinkley
Roger Brinkley talking about PhoneME.

high 5

Fracois Orsini, Silveira Neto and Ted Goddard
Fracois Orsini, me and Ted Goddard.

Gregg Sporar
Gregg Sporar on Java memory leaks.

Raghavan
Raghavan “Rags” Srinivas on Java runtime.

Louis Suarez-Potts and Vitorio. Furusho
Louis Suarez-Potts and Vitorio Y. Furusho talking. See also this excellent interview with Louis.

Ray Gans
Ray Gans on OpenJDK.

Rich Sands on OpenJDK
Rich Sands also on OpenJDK.

Meet Sun SPOT
Gary Thompson showing a Sun SPOT vehicle.

Rafael David Tinoco
Rafael David Tinoco on UltraSparc and OpenSparc.

Campus Party on FISL
Sérgio Amadeu da Silveira, Roberto Andrade e Marcelo D’Elia Branco in a informal retrospective about Campus Party.

Marge
Lucas Bortolaso Torri and Bruno Cavaler Ghisi talking about Marge Framework.

Rich Sands, me and Eduardo Lima

Be at FISL was a dream for me for a long time and finally I could achieve this year, and more specially participating as speaker. In the other hand, I spent lot of time finishing and preparing my demos and could not completely enjoy the event itself, but was a really good event, I meet a lot of people I only knew by mails lists and also meet a lot of people from Sun’s staff.

Porto Alegre

Porto Alegre

Dinner

Porto Alegre is also a very beautiful and well preserved city though I had almost no time to see it. And if during the daytime I almost don’t ate, during the night I went to very good restaurants and churrascarias. I went back to home some kilos fatter. 😛

  • ps.: I took hundreds of photos. There a set of them in my Flickr.
  • ps. 2: I tried to put the name of all who appeared in my photos. If I did a mistake, let me know, please.
  • ps. 3: I had a problem with my file system and I lose those slides I presented in FISL. 🙁 The only available is High Performance Computing and OpenSolaris.

Olá Mundo Paralelo com MPI

MPI é a sigla para Message Passing Interface, um padrão de comunicação de dados para computação paralela. O MPI oferece diversas abstracções que facilitam e padronizam o desenvolvimento de aplicações paralelas. Por exemplo, você pode programar para vários processadores, nós de um cluster, supercomputadores ou Internet utilizando a mesma infraestrutura transparentemente.
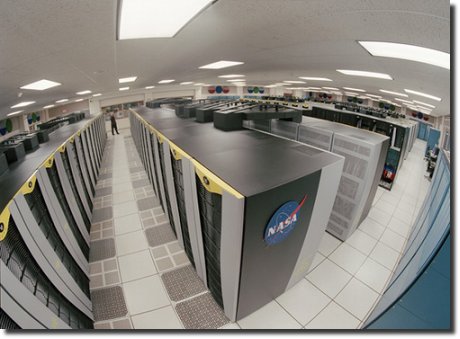
Supercomputador Nasa
Cluster Columbia da NASA, com 1024 nós.

Como MPI é um padrão, existem vários padrões de implementação, abertas, fechadas, comerciais ou gratuitas. MPI é definido a princípio para C e Fortran, mas há implementações em outras linguagens como Java ou Python, por exemplo. A implementação que eu vou utilizar nesse exemplo é a OpenMPI.

A notícia boa é que você não precisa ter um supercomputador em casa para aprender e praticar computação paralela, uma máquina doméstica serve. Se você tiver uma máquina com múltiplos processadores, melhor ainda.

Instalação

Para instalar um ambiente de desenvolvimento para MPI no Ubuntu Linux basta um comando:

sudo apt-get install build-essential openmpi-dev

Isso vai instalar um conjunto básico de compiladores e o ambiente OpenMPI.

O código

Vamos criar um arquivo chamado ola.c com o conteúdo:

#include
#include
int size, rank;
int main(int argc, char *argv[]){
   MPI_Init(&argc,&argv);
   MPI_Comm_size(MPI_COMM_WORLD,&size);
   MPI_Comm_rank(MPI_COMM_WORLD,&rank);
   printf("Oi. Eu sou o processo %d de %d\n", rank, size);
   MPI_Finalize();
}

Compilação

Para compilar esse código vamos usar o comando mpicc que foi instalado junto com o pacote openmpi-dev. Ele é uma interface para o gcc, e vai cuidar de toda a linkagem com as bibliotecas do MPI. Você pode usar os parâmetros do gcc com o mpicc.

mpicc ola.c -o ola

Se tudo der certo esse comando vai criar o binário ola.

Execução

Outra ferramenta importante é o mpirun, que levantar o mpi nos diversos nós e mandar cada nó executar o binário. O mpirun não precisa de um programa mpi para rodar, por exemplo, se dermos esse comando:

mpirun -np 4 echo oi

Você vai ter essa saída:

oi
oi
oi
oi

Você mandou 4 nós (-np 4) executar o comando echo oi (imprime oi). Para mandar 5 nós executarem nosso binário ola:

mpirun -np 5 ola

E vamos ter uma saída mais ou menos assim:

Oi. Eu sou o processo 1 de 5
Oi. Eu sou o processo 4 de 5
Oi. Eu sou o processo 0 de 5
Oi. Eu sou o processo 2 de 5
Oi. Eu sou o processo 3 de 5

Por que as saídas sairam desordenadas? Porque elas rodaram em paralelo e não temos como saber qual foi sua ordem de execução. Assim cada nó entrou no printf em um momento diferente e imprimiu seu rank e seu size naquele momento. Você pode experimentar usar o parâmetro -np com outros números maiores ou menores que 5.

Troca de Mensagens

Até aqui não há muita graça porque não há troca de mensagens. Há muito o que se dizer sobre como trocar mensagens do MPI mas a maneira mais fácil de se começar é com a função mpi_send.

Vamos fazer um programa bem simples onde o nó 0 vai mandar uma mensagem para o nó 1. A mensagem vai ser um número, 42. Criemos um arquivo chamado msg.c com o código:

#include
#include

int size, rank, msg, source, dest, tag;

int main(int argc, char *argv[]){
   MPI_Status stat;

   MPI_Init(&argc,&argv);
   MPI_Comm_size(MPI_COMM_WORLD,&size);
   MPI_Comm_rank(MPI_COMM_WORLD,&rank);

	if(rank==0){
   	msg = 42; dest = 1; tag = 0;
   	MPI_Send(&msg, 1, MPI_INT, dest, tag, MPI_COMM_WORLD);
   	printf("Processo %d enviou %d para %d.\n", rank, msg, dest);
	}

	if(rank==1){
		source = 0; tag = 0;
		MPI_Recv(&msg, 1, MPI_INT, source, tag, MPI_COMM_WORLD, &stat);
		printf("Processo %d recebeu %d de %d.\n", rank, msg, source);
	}

   MPI_Finalize();
}

No processo de rank 0 vamos enviar o conteúdo da variável inteira msg para o processo de rank 1. Note que no processo de rank 1, o valor de msg não está definido. O comando MPI_Send vai receber 6 parâmetros.

int MPI_Send( void *buf, int count, MPI_Datatype datatype, int dest, int tag, MPI_Comm comm)

  • void *buf, um ponteiro para a mensagem que você vai mandar. No nosso caso a variável inteira msg.
  • int count, a quantidade de elementos que tem nessa mensagem. No nossa caso só 1. Se quisemos mandar um vetor de dois inteiros, seria 2.
  • MPI_Datatype datatype, uma constante que define o tipo de dados que você está enviando. No nosso caso MPI_INT. Isso evita que ajam incompatibilidade no tamanho de inteiros entre arquiteturas diferentes.
  • int dest, o rank do nó destino, o destinatário. No nosso caso o nó 1.
  • int tag, a tag seria num email o assunto da mensagem. Estamos mandando tag 0 então no outro lado tem que estar esperando uma tag 0, caso contrário não há comunicação.
  • MPI_Comm comm, o comunicador. Nesse e na maioria dos casos a constante MPI_COMM_WORLD.

Do outro lado, no processo 1 vamos usar o MPI_recv, que recebe 7 parâmetros.

int MPI_Recv( void *buf, int count, MPI_Datatype datatype, int source, int tag, MPI_Comm comm, MPI_Status *status)

  • void *buf, um ponteiro para onde vai ser guardada a mensagem que vamos receber. No nosso caso a variável msg, que no processo 1 está vazia.
  • int count, a quantidade de elementos que vem nessa mensagem.
  • MPI_Datatype datatype, a mesma constante do MPI_send.
  • int source, o rank do nó remetente. No nosso caso o nó 0.
  • int tag, a tag da mensagem conforme explicado no MPI_send.
  • MPI_Comm comm, o comunicador.
  • MPI_Status *status, uma estrutura para que depois que a função for executada você possa inspecionar detalhes da transmissão. No nosso caso ela é inútil.

Para compilar esse exemplo usamos novamente o mpicc.

mpicc msg.c -o msg

E para executa-lo o mpirun.

mpirun -np 2 msg

O programa vai escrever essa mensagem:

Processo 0 enviou 42 para 1.
Processo 1 recebeu 42 de 0

No processo 1 a msg estava inicialmente vazia e no processo 0 havia 42, mas depois do MPI_recv o processo 1 pode escrever o conteúdo 42 de msg. Logo, houve comunicação.

Dicas

Por um problema no empacotamento do mpich no Ubuntu toda vez que você executa o MPI você recebe umas mensagens horrorosas de erro, que na verdade são só um aviso que ele não encontrou uma placa de rede Infiniband.

Para você silenciar na unha essa chatice use o mpirun assim:

mpiexec –mca btl ^openib -np 1 executável

Onde -np 1 deve ser substituido pelo seu número de processos e executável pelo seu executável.

Outra dica é que você pode utilizar uma distribuição Linux que já venha com o MPI instalado. Por exemplo o Scientific Linux ou o Parallel Knoppix.