Skip to content

Tag: netbeans

SCSNI Study Guide

This is a draft of study guide based on SCSNI (Sun Certified Specialist Netbeans IDE) exam objectives.

SCSNI Study Guide
Exam Objetive Resources
Section 1: IDE Configuration
1.1 Demonstrate the ability to configure the functionality available in the IDE, including using enabling and disabling functionality and using the Plugin Manager.
1.2 Explain the purpose of the user directory and the netbeans.conf file and how these can be used to configure the IDE.
1.3 Demonstrate the ability to work with servers in the IDE, such as registering new server instances and stopping and starting servers.
1.4 Describe how to integrate external libraries in the IDE and use them in coding and debugging your project.
1.5 Demonstrate knowledge of working with databases in the IDE, including registering new database connections and tables running SQL scripts.
1.6 Describe how to integrate and use different versions of the JDK in the IDE for coding, debugging, and viewing Javadoc documentation.
Section 2: Project Setup
2.1 Describe the characteristics and uses of a free-form project.
2.2 Demonstrate the ability to work with version control systems and the IDE. (Which VCS’s are available, which ones you need an external client for, how to pull sources out of a repository, view changes, and check them back in).
2.3 Describe the ways in which you can change the build process for a standard project, such as configuring project properties and modifying the project’s Ant build script.
2.4 Configure your project to compile against and run on a specific version of the JDK.
Section 3: Java SE Development
3.1 Demonstrate the ability to create NetBeans projects from the source code of an existing Java SE program.
3.2 Describe how to manage the classpath of a Java SE project, including maintaining a separate classpath for compiling and debugging.
3.3 Demonstrate the knowledge of the NetBeans GUI Builder and the ability to lay out and hook up basic forms using it.
3.4 Demonstrate the ability to package and distribute a built Java Desktop project for use by another user.
Section 4: Java EE Web Development
4.1 Describe how to create a NetBeans project from the source code of an existing Web application.
4.2 Distinguish between a visual web application and web application.
4.3 Demonstrate knowledge of which web frameworks are available in NetBeans IDE and how they are added to and used in a web application.
4.4 Describe how to monitor HTTP requests when running a web application.
4.5 Demonstrate a knowledge of basic tasks related to building and deploying web applications to a server, such as changing the target server and undeploying an application.
Section 5: Editing
5.1 Describe the purpose and uses of refactoring and demonstrate the ability to perform basic refactoring on Java source code.
5.2 Describe how to use the Options window to change the default appearance and behavior of the Source Editor.
5.3 Describe the ways that the IDE highlights errors in source code and the tools the IDE offers for correcting those errors.
5.4 Demonstrate the ability to use editor hints, such as implementing all the methods for an implemented interface
5.5 Demonstrate the ability to use live code templates such as automatic generation of constructors, try/catch loops, and getters and setters.
Section 6: Testing, Profiling, and Debugging
6.1 Demonstrate the ability to work with JUnit tests in the IDE, such as creating JUnit tests and interpreting JUnit test output.
6.2 Describe how to debug a local (desktop) application, including setting breakpoints and stepping through code.
6.3 Describe the difference between local and remote debugging and describe how to debug a remote (web) application.
6.4 Describe the purpose of profiling applications and how to profile a local desktop application in the IDE.

More useful resources:

Please, collaborate in the comments with others resource links (with section number). Let’s complete this guide.

JavaFX Overview Slides

My slides about a overview on JavaFX at our last CEJUG event.

JavaFX Overview

View SlideShare presentation or Upload your own. (tags: javafx ria)

Downloads:

Café com Tapioca na Christus

Café com Tapioca na Christus

Here a little screncast showing the live preview feature on the NetBeans JavaFX Plugin.

[youtube]vCWQtQgdpUA[/youtube]

You can also download the orignal screencast in higher resolution netbeans_javafx_preview.ogg (15 Mb). Photos of the presentation at my Flickr album.

JavaFX, Duke Potato

Do you know the toy Mr. Potato Head? Now meet the Java Potato.

[youtube]6NrUdp5XX_o[/youtube]

Duke images here from previous dukes I posted and other images from Open Clipart Project.

Java Web Start:

The code:

package dukepotato;

import javafx.application.Frame;
import javafx.application.Stage;
import javafx.scene.CustomNode;
import javafx.scene.Node;
import javafx.scene.Group;
import javafx.input.MouseEvent;
import javafx.scene.geometry.Circle;
import javafx.scene.paint.Color;
import javafx.scene.image.ImageView;
import javafx.scene.image.Image;

public class Img extends ImageView{
    public  attribute content: Node[];
    public  attribute src: String;

    private attribute endX = 0.0;
    private attribute endY = 0.0;
    private attribute startX = 0.0;
    private attribute startY = 0.0;

    override attribute translateX = bind endX;
    override attribute translateY = bind endY;
    override attribute blocksMouse = true;

    init {
        image = Image {
            url: "{__DIR__}/{src}"
        }
    }

    override attribute onMousePressed = function(e:MouseEvent):Void {
        startX = e.getDragX()-endX;
        startY = e.getDragY()-endY;
    }

    override attribute onMouseDragged = function(e:MouseEvent):Void {
        endX = e.getDragX()-startX;
        endY = e.getDragY()-startY;
    }
}

var dukesimages = ["duke1.png", "duke2.png", "duke3.png", "duke4.png"];
var dukes = for (image in dukesimages){
    Image {
        url: "{__DIR__}/{image}"
    }
}
var index = 0;
var duke = ImageView {
    x: 200, y:170
    image: bind dukes[index];
    onMouseClicked: function( e: MouseEvent ):Void {
        index = (index + 1) mod sizeof dukesimages;
    }
}

var hat = Img { src: "hat.png", x: 370 }
var partyhat = Img { src: "party_hat.png", x: 160, y: 5 }
var cap = Img { src: "cap.png", x: 230, y: 10 }
var cake = Img { src: "cake.png", x: 526, y: 190 }
var glove = Img { src: "glove.png", x: 338, y: 363 }
var baseball = Img { src: "baseball.png", x: 548, y:373 }
var pencil = Img { src: "pencil.png", x: 451, y: 365 }
var camera = Img { src: "camera.png", x: 125, y: 380 }
var coffee = Img { src: "coffee.png", x: 541, y: 114 }
var burger = Img { src: "burger.png", x: 542, y: 282 }
var diamond = Img { src: "diamond.png", x: 243, y: 383 }
var pliers = Img { src: "pliers.png", x: 20, y: 368 }
var rubikcube = Img { src : "rubikcube.png", x: 37, y: 295 }
var syringe = Img { src: "syringe.png", x: 35, y: 245 }
var hourglass = Img { src: "hourglass.png", x: 35, y: 127 }
var adventurehat = Img { src: "adventurehat.png", x: 8, y:30 }
var tie = Img { src: "tie.png", x: 547, y:35 }

Frame {
    title: "Duke Potato"
    width: 640
    height: 480
    closeAction: function() {
        java.lang.System.exit( 0 );
    }
    visible: true

    stage: Stage {
        content: [duke, hat, partyhat, cake, adventurehat, cap, glove,
            baseball, pencil, camera, coffee, burger, diamond,
            pliers, rubikcube, syringe, hourglass, tie]
    }
}
  • Lines 14 to 42 is the same dragging approach I showed in the post Draggable Nodes, but this time creating a class that inherits the behavior of ImageView.
  • Lines 44 to 57 is the Duke that changes when you click on it. It cycles over the dukesimages list.
  • Lines 59 to 75 is just instantiations of all toys and objects we will use to dress the Duke. Look how easier was to create and place a image.
  • Lines 78 to the end is just creating a Frame and putting all elements on it.

Download a package with the NetBeans project, sources, libraries and images, DukePotato.tar.gz.

JavaFX, Side Scrolling Gaming

I started to make several small JavaFX game demos. I’m doing that to fell where JavaFX is good to make this sort of game and what patterns would be frequently needed to implement, where I will place a little framework for fast development of simple casual games. What I’m calling now just ‘GameFX’. My first experiment was to creating a side scrolling animation that’s is usefull to create the parallax effect in side scrolling games. For that I created the class Slidding. You create an Slidding with a set of nodes and they will slide from right to left and when a node reaches the left side it back to the right side.

Example:

Slidding {
    content: [
       Circle {
           centerX: 100, centerY: 100, radius: 40
           fill: Color.RED
       },
       Circle {
           centerX: 300, centerY: 100, radius: 40
           fill: Color.BLUE
       }
    ]
    clock: 0.05s
 }

That produces:

You create a Slidding with a list of Nodes at content, a clock (that will determine the speed of that animation) and a width. If you don’t provide a width, the slidding will do the best effort to determine one. You can use this approach to create more complex scenarios, using more Slidding groups.

This is a example of that:

import javafx.application.*;
import javafx.animation.*;
import javafx.scene.geometry.*;
import javafx.scene.paint.*;
import javafx.scene.*;

import gamefx.Slidding;

var SCREENW = 500;
var SCREENH = 400;

/* the sky is a light blue rectangle */
var sky = Rectangle {
    width: SCREENW, height: SCREENH
    fill: LinearGradient {
        startX: 0.0 , startY: 0.0
        endX: 0.0, endY: 1.0
        proportional: true
        stops: [
            Stop { offset: 0.0 color: Color.LIGHTBLUE },
            Stop { offset: 0.7 color: Color.LIGHTYELLOW },
            Stop { offset: 1.0 color: Color.YELLOW }
        ]
    }
}

/* the ground is a olive rectangle */
var ground = Rectangle {
    translateY: 300
    width: 500, height: 100
    fill: LinearGradient {
        startX: 0.0 , startY: 0.0
        endX: 0.0, endY: 1.0
        proportional: true
        stops: [
            Stop { offset: 0.2 color: Color.OLIVE },
            Stop { offset: 1.0 color: Color.DARKOLIVEGREEN }
        ]
    }
}

/* a clod cloud is like an ellipse */
class Cloud extends Ellipse {
    override attribute radiusX = 50;
    override attribute radiusY = 25;
    override attribute fill = Color.WHITESMOKE;
    override attribute opacity = 0.5;
}

/* we create a slidding of clouds */
var clouds = Slidding {
    content: [
        Cloud{centerX: 100, centerY: 100},
        Cloud{centerX: 150, centerY:  20},
        Cloud{centerX: 220, centerY: 150},
        Cloud{centerX: 260, centerY: 200},
        Cloud{centerX: 310, centerY:  40},
        Cloud{centerX: 390, centerY: 150},
        Cloud{centerX: 450, centerY:  30},
        Cloud{centerX: 550, centerY: 100},
    ]
    clock: 0.2s
}

var SUNX = 100;
var SUNY = 300;
var rotation = 0;

/* the sun, with it's corona */
var sun = Group {
    rotate: bind rotation
    anchorX: SUNX, anchorY: SUNY
    content: [
        for (i in [0..11]) {
            Arc {
                centerX: SUNX, centerY: SUNY
                radiusX: 500, radiusY: 500
                startAngle: 2 * i * (360 / 24), length: 360 / 24
                type: ArcType.ROUND
                fill: Color.YELLOW
                opacity: 0.3
            }
        },
        Circle {
            centerX: SUNX, centerY: SUNY, radius: 60
            fill: Color.YELLOW
        },
    ]
}

/* animate the corona changing the it rotation angle */
var anim = Timeline {
    repeatCount: Timeline.INDEFINITE
    keyFrames : [
        KeyFrame {
            time : 0s
            values: rotation => 0.0 tween Interpolator.LINEAR
        },
        KeyFrame {
            time : 2s
            values: rotation => (360.0/12) tween Interpolator.LINEAR
        },
    ]
}
anim.start();

/* a tree is a simple polygon */
class Tree extends Polygon{
    public attribute x = 0;
    public attribute y = 0;
    override attribute points = [0,0, 10,30, -10,30];
    override attribute fill = Color.DARKOLIVEGREEN;
    init{
        translateX = x;
        translateY = y;
    }
}

/* a forest is a lot of trees */
var forest = Slidding{
    content: [
        Tree{x: 20, y: 320}, Tree{x: 80, y: 280}, Tree{x:120, y: 330},
        Tree{x:140, y: 280}, Tree{x:180, y: 310}, Tree{x:220, y: 320},
        Tree{x:260, y: 280}, Tree{x:280, y: 320}, Tree{x:300, y: 300},
        Tree{x:400, y: 320}, Tree{x:500, y: 280}, Tree{x:500, y: 320}
    ]
    clock: 0.1s
    width: SCREENW
}

Frame {
    title: "Side Scrolling"
    width: SCREENW
    height: SCREENH
    closeAction: function() {
        java.lang.System.exit( 0 );
    }
    visible: true

    stage: Stage {
        content: [sky, sun, clouds, ground, forest]
    }
}

Producing:

If you want to try these examples, place this Slidding implementation as Slidding.fx in a directory named gamefx, or grab here the NetBeans project.

package gamefx;

import javafx.scene.CustomNode;
import javafx.scene.Node;
import javafx.scene.Group;
import javafx.animation.Timeline;
import javafx.animation.KeyFrame;

/*
 * The slidding group of nodes for side scrolling animations.
 *
 * @example
 * Slidding {
 *    width: 300
 *    content: [
 *       Circle { centerX: 100, centerY: 100, radius: 40, fill: Color.RED },
 *       Circle { centerX: 200, centerY: 100, radius: 40, fill: Color.BLUE },
 *    ]
 *    clock: 0.05s
 * }
 */
public class Slidding extends CustomNode {
    public attribute content: Node[];
    public attribute clock = 0.1s;
    public attribute width: Number;

    public attribute autostart = true;
    public attribute cycle = true;

    public attribute anim = Timeline {
        repeatCount: Timeline.INDEFINITE
        keyFrames : [
            KeyFrame {
                time : clock
                action: function() {
                    for(node in content){
                        node.translateX--;
                        if (node.getX() + node.translateX + node.getWidth() <= 0){
                            if(cycle){
                                node.translateX = width - node.getX();
                            } else {
                                delete node from content;
                            }
                        }
                    }
                } // action
            } // keyframe
        ]
    } // timeline 

    public function create(): Node {
        // if width is not setted, we try to figure out
        if(width == 0) {
            for(node in content) {
                if(node.getX() + node.getWidth() > width) {
                    width = node.getX() + node.getWidth();
                }
            }
        }

        // normaly the slidding will start automaticaly
        if(autostart){
            anim.start();
        }

        // just a Group of Nodes
        return Group {
            content: content
        };
    }
}

Is not the final implementation but it’s a idea. Soon I’ll show a demo game I did using theses codes.

Anúncio do NetBeans 6.5 Beta

O Netbeans.org anunciou a disponibilidade do NetBeans IDE 6.5 Beta. Abaixo a tradução do anúncio:

O NetBeans IDE 6.5 introduz várias novas funcionalidades, incluindo uma IDE robusta para PHP, deputação de JavaScript para o Firefox e IE, e suporte a Groovy e Grails. Esse lançamento também inclui várias melhorias para o desenvolvimento em Java, Ruby e Rails, e C/C++. Dentre as melhorias no Java destacam-se: suporte nativo ao Hibernate, importação de projetos do Eclipse, e compilação no salvamento.

Links:

Outros destaques:

  • PHP
    • Completação de código
    • Consertos rápidos e checagem semântica
    • Suporte a FTP
    • Depuração com Xdebug
    • Suporte a Web Services populares
  • Ajax/JavaScript
    • Suporte a depuração no Firefox e IE
    • Monitoramento cliente de HTTP
    • Vêm com as bibliotecas mais populares de JavaScript
  • Java
    • Suporte a Groovy/Grails
    • Compilação/Deploy no momento do salvamento
    • Importação e sincronização de projetos do Eclipse
    • Suporte nativo a Hibernate
    • Gerador de CRUD JSF agora com Ajax
  • Banco de Dados
    • Melhorias no editor
  • C/C++
    • Melhorias na completação de código e destaque de erros
    • Desenvolvimento remoto
  • Ruby
    • Suporte aos Testes Ruby
    • Melhoria no suporte a Rake
  • GlassFish V3 “Prelude”
    • Menor tamanho, inicialização e deployment mais rápido
    • Suporte a scripting, inclusive jRuby

O NetBeans IDE 6.5 final está planejado para ser lançado em Outubro de 2008. Como sempre, é bem vindo e nós encorajamos seu feedback sobre sua experiência usando a IDE NetBeans. Visite nossas listas de email ou faça uma postagem no seu blog.

JavaFX, Draggable Nodes

One thing that I like a lot to do with JavaFX is draggable objects. Due to some recent changes in the JavaFX syntax my old codes for that are no longer working. Joshua Marinacci from Sun’s JavaFX engineering team and other guys from the JavaFX community gave me some tips. Here some strategies I’m using for making draggable nodes in JavaFX.

In this first example, a simple draggable ellipse.


video url: http://www.youtube.com/watch?v=pAJHH-mPLaQ

import javafx.application.*;
import javafx.scene.paint.*;
import javafx.scene.geometry.*;
import javafx.input.*;

Frame {
    width: 300, height: 300, visible: true
    stage: Stage {
        content: [
            Ellipse {
                var endX = 0.0; var endY = 0.0
                var startX = 0.0; var startY = 0.0
                centerX: 150, centerY: 150
                radiusX: 80, radiusY: 40
                fill: Color.ORANGE
                translateX: bind endX
                translateY: bind endY
                onMousePressed: function(e:MouseEvent):Void {
                    startX = e.getDragX()-endX;
                    startY = e.getDragY()-endY;
                }
                onMouseDragged: function(e:MouseEvent):Void {
                    endX = e.getDragX()-startX;
                    endY = e.getDragY()-startY;
                }
            }
        ]

    }
}

When you need to create a group of draggable objects, you can try thie approach of a draggable group like this. Inside on it, you can put whatever you want.


Video url: http://www.youtube.com/watch?v=mHOcPRrgQCQ

import javafx.application.*;
import javafx.scene.paint.*;
import javafx.scene.geometry.*;
import javafx.input.*;
import javafx.scene.*;
import javafx.scene.effect.*;
import javafx.scene.image.*;
import javafx.animation.*;

// a graggable group
public class DragGroup extends CustomNode{
    public attribute content: Node[];
    
    private attribute endX = 0.0;
    private attribute endY = 0.0;

    private attribute startX = 0.0;
    private attribute startY = 0.0;

    public function create(): Node {
        return Group{
            translateX: bind endX
            translateY: bind endY
            content: bind content
        }
    }

    override attribute onMousePressed = function(e:MouseEvent):Void {
        startX = e.getDragX()-endX;
        startY = e.getDragY()-endY;
    }
    
    override attribute onMouseDragged = function(e:MouseEvent):Void {
        endX = e.getDragX()-startX;
        endY = e.getDragY()-startY;
    }
}

// angle animation, cycles between 0 to 360 in 36 seconds
var angle = 0.0;
var angleAnimation = Timeline {
    repeatCount: Timeline.INDEFINITE
    keyFrames : [
        KeyFrame {
            time: 0s
            values: 
                    angle => 0.0
        },
        KeyFrame{
            time: 36s
            values :  
                    angle => 360.0 tween Interpolator.LINEAR
        }
    ]
}

// some pictures from my Flickr albums 
var me    = "http://farm4.static.flickr.com/3042/2746737338_aa3041f283_m.jpg";


var dog   = "http://farm4.static.flickr.com/3184/2717290793_ec14c26a85_m.jpg";
var plant = "http://farm4.static.flickr.com/3014/2731177705_bed6d6b8fa_m.jpg";
var bird  = "http://farm4.static.flickr.com/3190/2734919599_a0110e7ce0_m.jpg";
var me_89  = "http://farm3.static.flickr.com/2138/2308085138_7b296cc5d0_m.jpg";


Frame {    
    width: 640, height: 480, visible: true
    stage: Stage {
        fill: Color.BLACK
        content: [
            DragGroup{
                content: ImageView {
                    anchorX: 120, anchorY: 90
                    rotate: bind 30 + angle
                    image: Image { backgroundLoading: true, url: me }
                }
            },
            DragGroup {
                translateX: 300, translateY: 50
                content: ImageView {
                    anchorX: 120, anchorY: 90
                    rotate: bind -30 + angle
                    image: Image { backgroundLoading: true, url: dog }
                }
            },
            DragGroup {
                translateX: 300, translateY: 300
                content: ImageView {
                    anchorX: 120, anchorY: 90
                    rotate: bind 90 + angle
                    image: Image { backgroundLoading: true, url: plant }
                }                
            },
            DragGroup {
                translateX: 200
                translateY: 200
                content: ImageView {
                    anchorX: 120, anchorY: 90
                    rotate: bind 90 + angle
                    image: Image { backgroundLoading: true, url: bird }
                }                
            },
            DragGroup {
                translateX: 30
                translateY: 200
                content: ImageView {
                    anchorX: 85, anchorY: 120
                    rotate: bind angle + 180
                    image: Image { backgroundLoading: true, url: me_89 }
                }                
            },
        ]

    }
    
    closeAction: function() { 
        java.lang.System.exit( 0 ); 
    }
}

angleAnimation.start();

One more example, using the same class DragGroup, we can put multiple nodes using lists.


Video url: http://www.youtube.com/watch?v=gJqy7EdtEqs

import javafx.application.*;
import javafx.scene.*;
import javafx.scene.geometry.*;
import javafx.scene.paint.*;
import javafx.input.*;
import javafx.animation.*;
import java.lang.Math;

// Class to create a draggable group of objects
public class DragGroup extends CustomNode{
    public attribute content: Node[];
    
    private attribute endX = 0.0;
    private attribute endY = 0.0;

    private attribute startX = 0.0;
    private attribute startY = 0.0;
    
    override attribute onMousePressed = function(e:MouseEvent):Void {
        startX = e.getDragX()-endX;
        startY = e.getDragY()-endY;
    }
    
    override attribute onMouseDragged = function(e:MouseEvent):Void {
        endX = e.getDragX()-startX;
        endY = e.getDragY()-startY;
    }
    
    public function create(): Node {
        return Group{
            translateX: bind endX
            translateY: bind endY
            content: bind content
        }
    }
}

// angle animation, cycles between 0 to 360 in 10 seconds
var angle = 0.0;
var angleAnimation = Timeline {
    repeatCount: Timeline.INDEFINITE
    keyFrames : [
        KeyFrame {
            time: 0s
            values: angle => 0.0
        },
        KeyFrame{
            time: 10s
            values :  angle => 360.0 tween Interpolator.LINEAR
        }
    ]
}

// breath animation, go and back from 0.0 to 10.0 in 2 seconds
var breath = 0.0;
var breathAnimation = Timeline {
    repeatCount: Timeline.INDEFINITE
    autoReverse: true
    keyFrames : [
        KeyFrame {
            time: 0s
            values: breath => 0.0
        },
        KeyFrame{
            time: 1s
            values :  breath => 10.0 tween Interpolator.LINEAR
        }
    ]
}

// Creates n multi colored floating circles around a bigger circle
var n = 12;
var colors = [
    Color.BLUE, Color.AQUA, Color.MAGENTA, Color.RED,
    Color.YELLOW, Color.ORANGE, Color.HOTPINK, Color.LIME
];
var chosen = Color.YELLOW;
var floatingCircles = Group{
    rotate: bind angle
    content: for (i in [1..n]) 
    Circle {
        fill: colors[i mod sizeof colors]
        radius: 10
        centerX: Math.cos(i * 2 * Math.PI/n) * 70
        centerY: Math.sin(i * 2 * Math.PI/n) * 70
        onMouseClicked: function( e: MouseEvent ):Void {
            chosen = colors[i mod sizeof colors];
        }
    }
}
var circle = Circle{
    radius: bind 50 + breath
    fill: bind chosen
}


Frame {
    width: 400, height: 400, visible: true
    stage: Stage {
        fill: Color.BLACK
        content: [
            DragGroup{
                translateX: 200, translateY: 200
                content: [circle, floatingCircles]
            }
        ]
    }
    
    closeAction: function() { 
        java.lang.System.exit( 0 ); 
    }
}

// starts all animations
angleAnimation.start();
breathAnimation.start();

JavaFX, handling events with overlapping elements

Here is a problem I faced those days while programming with JavaFX.
When you perform a click in a JavaFX area, mouse events are called to all nodes through that position. You can see this behavior in this video.

Example 1.

Here is the code.

import javafx.application.*;
import javafx.scene.geometry.*;
import javafx.scene.geometry.Rectangle;
import javafx.scene.paint.Color;
import javafx.input.MouseEvent;

Frame {
    width: 200
    height: 200
    visible: true
    stage: Stage {
        content: [
            Rectangle {
                var color1 = Color.BLUE;
                x: 10, y: 10, width: 140, height: 90, fill: bind color1
                onMouseClicked: function( e: MouseEvent ):Void {
                    if (color1==Color.BLUE){
                        color1 = Color.GREEN;
                    } else {
                        color1 = Color.BLUE
                    }
                }
            },
            Circle {
                var color2 = Color.RED
                centerX: 100, centerY: 100, radius: 40, fill: bind color2
                onMouseClicked: function( e: MouseEvent ):Void {
                    if (color2==Color.YELLOW){
                        color2 = Color.RED;
                    } else {
                        color2 = Color.YELLOW
                    }
                }
            }
        ]
    }
}

This is the default behavior. All node are called with a mouse event. Is a expected and robust behavior but sometimes we just don’t want that. We want events called to just one node or a set of nodes.

Example 2.

Is exactly the same code but with blocksMouse: true in the circle node. When blocksMouse is true the mouse event will not be called to others node behind it.

package overlapping;

import javafx.application.*;
import javafx.scene.geometry.*;
import javafx.scene.geometry.Rectangle;
import javafx.scene.paint.Color;
import javafx.input.MouseEvent;

Frame {
    width: 200
    height: 200
    visible: true
    stage: Stage {
        content: [
            Rectangle {
                var color1 = Color.BLUE;
                x: 10, y: 10, width: 140, height: 90, fill: bind color1
                onMouseClicked: function( e: MouseEvent ):Void {
                    if (color1==Color.BLUE){
                        color1 = Color.GREEN;
                    } else {
                        color1 = Color.BLUE
                    }
                }
            },
            Circle {
                var color2 = Color.RED
                centerX: 100, centerY: 100, radius: 40, fill: bind color2
                blocksMouse: true
                onMouseClicked: function( e: MouseEvent ):Void {
                    if (color2==Color.YELLOW){
                        color2 = Color.RED;
                    } else {
                        color2 = Color.YELLOW
                    }
                }
            }
        ]
    }
}

Thanks guys on the OpenJDK user mail list and at OpenJFX Forum, specially this thread.

Event Review: JavaDay Juazeiro do Norte

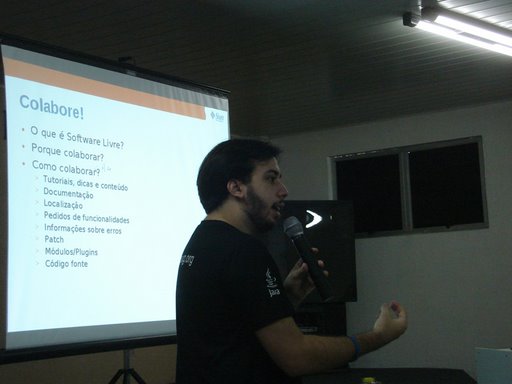
Rafael Carneiro, Tarso Bersa, Rafael Ponte and me, after 8 hours of bus travel, arrived in Juazeiro do Norte to talk at the first JavaDay there.

Why Free Software?

JavaDay_Juazeiro_do_Norte_Silveira_Rafael Last touches

JavaDay Juazeiro do Norte Silveira Neto Coffee Break Gifts Silveira Rafael Ponte

  • Rafael Carneiro talked about Java Certification.
  • Tarso Bersa talked about Spring Framework for JEE applications.
  • I talked about NetBeans 6.
  • Rafael Ponte talked about JavaServer Faces.

We answered a lot of questions and gave lot of gifts. I also showed the Sun Academic Initiative, which they are already subscribed. We also showed several opportunities they can participate with CEJUG like free vouchers or a free travel for Belgium.

Some pictures we took. These ones during the bus travel. We saw a nice sunrise through beautiful landscapes.

P5260004 P5260005 P5260007 P5260006

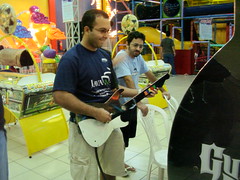
We playing guitar hero. 😀 The city have their own shopping with games, restaurant and cinema.

Guitar Hero Guitar Hero

The main atraction at Juazeiro is a statue of Padre (Priest) Cícero with 7 meters itself and more 8 meters of base. Pilgrimage to this statue takes place in his honour every November, attracting thousands of followers. The city’s economy is highly influenced by those travelers devotes.

Padim fitas

eu e o padim Padim

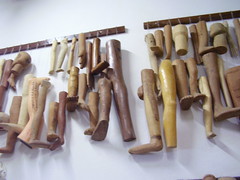
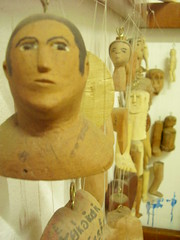
There’s a museum with several personal objects from Padre Cicero. People go there in order to thanks for miracles. If you got your a part of your body cured, of place there a wooden replica of that part of your body. If you got a car, you place a wooden car or a photo, and so on. There is thousands, maybe millions, of objects theres.

P5270054 P5270063

P5270058 P5270056 P5270062

You can see all photos at Carneiro’s album or in my album.